
A nice straightforward ‘bread and butter’ dry fly this month, one I have to admit I have overlooked in the past. But I tied a few up early in the season and brought them back to the ‘go to section’ of my fly box. I am glad I did as it has caught its fair share of trout this season and hopefully there’s more to come.
It’s a tough little fly, which after an initial treatment will continue to ‘outfloat’ other patterns.
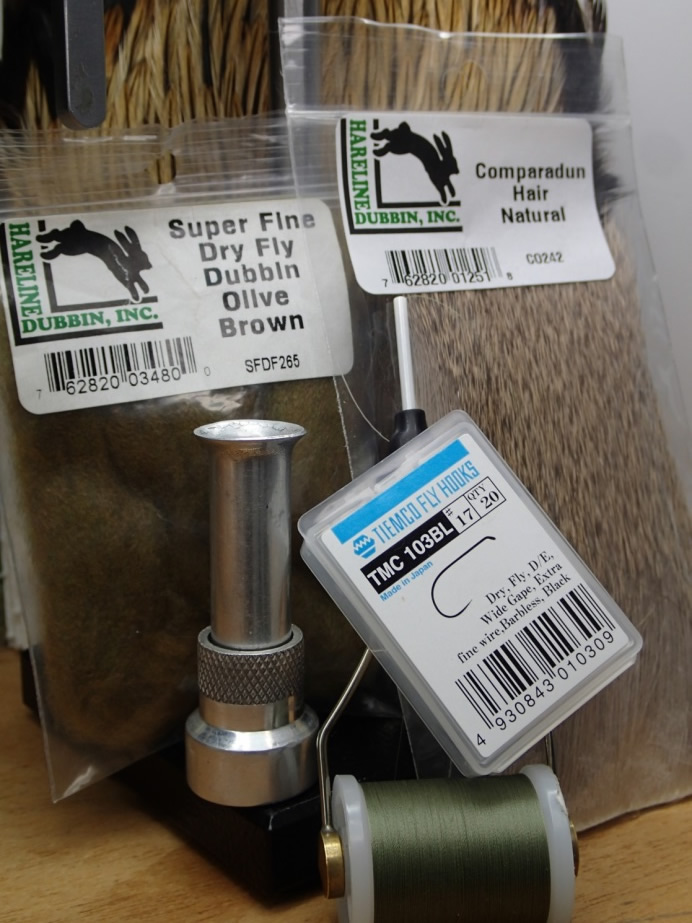 |
Hook
Tiemco 103BL #17 or Fly Tying Boutique ‘Dry Fly Light’#16
Thread
Veevus A05 Olive 16/0
Tail
Indian Cock Cape fibres Golden Honey Badger
Body
Super Fine Dubbing/ Olive Brown
Wing
Deer Hair- Comparadun
|
Tying
A straightforward pattern to tie with the emphasis on good quality materials and taking time to ensure everything is in proportion. Using the comparadun deer hair (being fine and strong), should ensure the wing being tied without excessive build up on the body.
I have found it important not to make the tail too bulky, using just a few fibres. A bulky tail in my experience makes the fly sit with the tail higher than the thorax/wing in the water looking unnatural. I see a lot of fly patterns with thick tails incorporating loads of fibres yet I know of very few (if any) adult flies or nymphs on our UK waters with these huge bushy tails!
While on the subject of tail fibres I have started buying the cheap Indian Cock Capes purely to use for tails in my nymphs and dries. The individual feather fibres are nice and long and I can try different colours without breaking the bank. Why use expensive genetic capes for tails?
The excellent Veevus thread again my favourite choice, the #16/0 having outstanding strength for its size.
- Vice up the hook, apply a little wax to your thread and catch in. Wind the thread with touching turns about halfway down the shank and then back up to where the wing is to sit just below the eye.

- Take a small pinch of deer hair and cut away close to the skin. Gently pull away any unwanted soft down/unwanted fibres.

- Place the deer hair in your hair stacker and give a few taps to ensure all the fibres are aligned. Remove from the stacker holding between thumb and finger ready to tie in.

- The wing length wants to be approximately the same length as the shank of the hook. With the deer hair tips pointing towards the eye catch in the fibres with a turn of the thread hold the waste end firmly between the fingers. If happy with the wing length tighten up the thread.

- This will flare out the deer hair, try to ensure fibres don’t slip under the hook. Now tie in the wing with four or five more tight turns still holding on to the waste.

- Then with the wing now held in place trim off the waste deer hair as tight as possible to the thread. Not essential but (looks easy on fly tying videos with a size 10 but tricky with smaller hooks!) try to allow the scissors to lay close to the shank and cut up away, this will help achieve a smooth body taper.

- Now cover the waste deer hair creating a nice smooth taper and then using thumb and forefinger smooth all the fibres upwards. To ensure the wing stays upright and in place I take a couple of turns in front of the wing. Leave the thread just in front of the start of the bend.

With the waste trimmed...

Cover up to form a smooth taper.
- Select the tail fibres, no more than 10 and tie in the tail with one turn. I like the tail to be the same length as the shank of the hook. If happy with the length tie in the fibres up towards the wing. I trim off the waste tight to the start of the tied in deer hair again to try and assist a smooth body with no lumps and bumps.

Tie in...

Trim and then cover waste.
- Take the thread back down to the base of the tail and then add a little dubbing along enough thread to cover the body and around the base of the wing.

- Now using a tightly twisted dubbing work up the body, around and in front of the wing right up to the eye. If needed remove or add dubbing during the process.

- All that remains is to whip finish with a little varnish or wax to secure and trim off the thread.

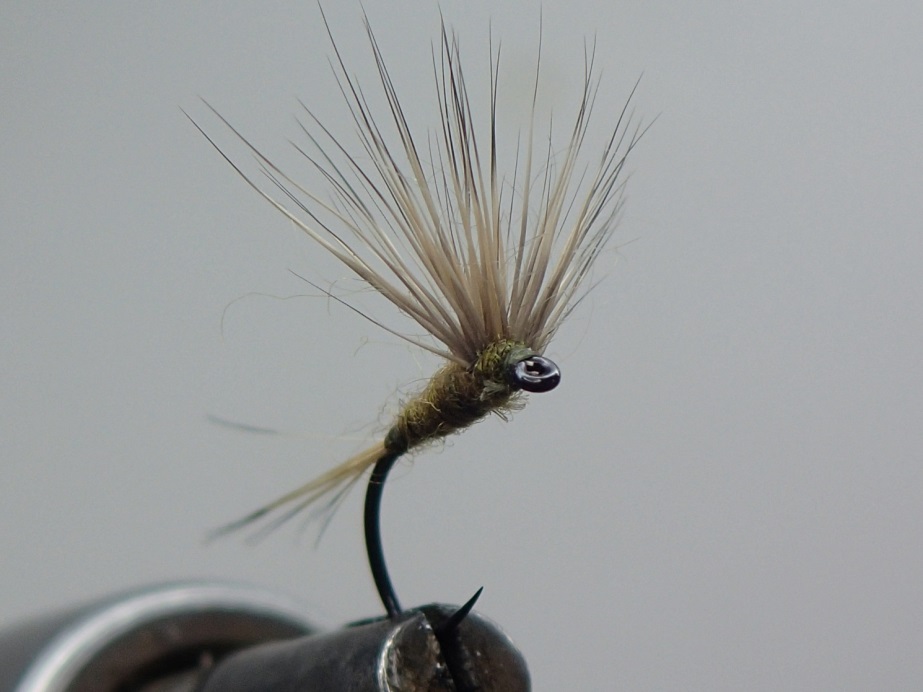
- The finished fly.

Look out for these…
- Crazy deer hair moments! As we know this material has a mind of its own. A little care on the first few turns to catch in the wing will prevent mad ‘flaring and spinning’.
- Keep the tail from being too bushy.
- Make sure you're happy with the body profile before adding dubbing. Look for a smooth ‘carrot’ shape leading up to the wing.
Different angles.

Summary
The fly sits really well in the water, the deer hair wing creating a realistic profile. As mentioned before with a little treatment before use the fly continues to float well after many casts. It even withstands the occasional ‘dunk’. This makes it a great fly when casting in tight spots under bankside cover, where (with my average casting!) it’s not always possible for a really clean lift off required with my favourite CDC wings.
As ever colours and sizes are down to personal preference. I prefer to stick to #16 and below attempting to imitate the olives on my waters.
For an excellent variation of this pattern don’t forget to try the ‘shuck’ tail, as shown in the article by Pete Tyjas in issue 15.
You can contact Warren via email or call him on 07771 558 028.