I'm delighted Warren's decided to share this one, having procured a number from him it's right up there with the Red Neck PTN for me when fishing for both trout & grayling. I also thought that if I mentioned 'how good it was' enough times he'd tie me some more ~ Jim
I started tying this nymph some time ago when all the rain had left a murky tinge in the River Wylye. The aim was to produce a nymph that would stand out and catch the attention of the residents of our mill pool.
I had grayling primarily in mind with the silver bead and flouro yellow quill, and thought the fly may be too bright for the cagy wild brownies. My initial worries were unfounded as on its first outing the ‘bling nymph’ took both trout and grayling.
The fly may prove to be a little too much for some gin clear conditions where I would use the traditional copper or black bead with an olive or natural quill. But after recent outings on the Coln and Wylye in perfect conditions this pattern continues to produce.
The hook used for this article is a new Veniard dry fly/ light nymph which I was introduced to by Keith Passant (and cadge a couple of packs off, cheers mate) they are great hooks in both quality and value. Unfortunately they only go down to #16, so I am using the tried and tested Tiemco 100SPL for the smaller sizes which is a slightly heavier wire but still ok.

Materials
- Hook : Veniard Dry Fly/light Nymph VH211 or Tiemco 100SPl
- Bead : Silver tungsten 2.5mm /2mm
- Thread : Sheer 14/0 Lt Cahill
- Tail : Brown cape feather
- Body : Polish Quill Flouro yellow
- Thorax : Natural Squirrel Dubbing
Tying
An easy enough tie so take extra time to get everything spot on, taking care to get the tail length and body shape right. One thing that is worth a mention is the quills need protection. I mostly use a coat of good old Sally Hansen ‘hard as nails’ varnish but have also started using a UV cure product which is great, but if not applied carefully can build up the body too much.
This coat of varnish also brings out the colour of the quill leaving a lovely sheen. I don’t worry if the thread shows through the quill in places, the idea of the light thread is to help emphasise the segmented body effect.
A quick mention on the tail
When I pull the fibres from the feather they end up between my fingers at slightly different lengths which I prefer as otherwise the tail looks less natural and more regimental.
1. Push the bead onto the hook and vice up.

2. Catch in the thread behind the bead and start to build a tapered body leaving the thread just short of the bend.

3. For the tail take the cape feather and stroke the fibres gently towards the base of the feather, then grab a good pinch of fibres between thumb and finger then pull away.


4. Tie in fibres just above bend with one or two turns. Make sure all of the tail sits on top of the hook.

5. Gently pull the fibres holding firmly at the base towards the eye until the tail is the required length (a little shorter than the shank) secure with one more turn.

6. Now select your quill, they will vary a little in colour in the pack so make sure you are happy, the best ones are where the black edge is bold and well defined from the rest of the quill. I now hold the quill at the ends and gently pull, the fine end usually breaks at the weakest point leaving you with a reasonably strong tip to tie in.

7. Tie in the quill with the dark edge facing the bend of the hook. Try to tie in at an angle bearing in mind you will want to wind the delicate quill around the shank.
All turns of thread should be kept to a minimum at the base to prevent a bulky tail.

8. Wind the thread back up the shank using touching turns covering all the waste materials as you move up. Take the thread right up to just short of the eye. Trim away waste nice and neatly.

9. Now take the end of the quill in your hackle pliers and carefully wind the quill up the shank, the first turn is the crucial one (sometimes snapping!) For the best effect the quill should not overlap and can even have very small gaps between showing the light thread under base.

10. Wind the quill up the shank just short of the bead and tie in. I now make a couple of whip finishes to hold it all in place safe and sound, but leaving the thread hanging on the bobbin to continue the tie after varnishing. Trim away the waste quill.
11. Now give the quill a coat of varnish taking care to brush in and not to get any varnish on the tail fibres. Any ‘runs’ or drips should be avoided as when dry they will spoil the body.

12. Allow varnish to fully dry (one advantage of using a UV cure) then lightly wax the thread.
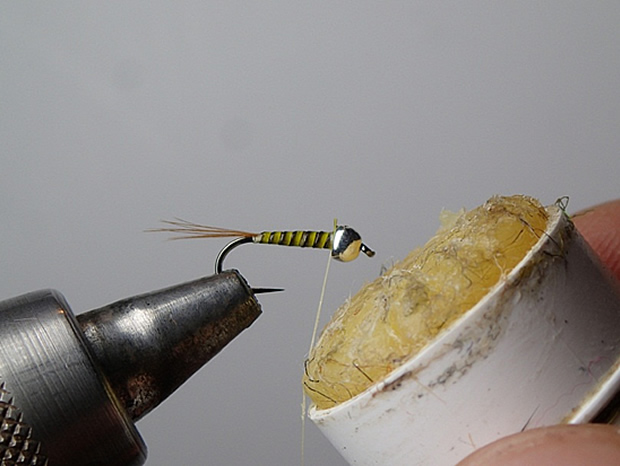
13. Now take a pinch of dubbing and apply to thread by rolling between fingers to form a rope.

14. Wind the dubbing around tight up against the bead three or four turns is usually enough to form a nice thorax. I like to have a few longer fibres in the thorax to give a ‘leggy’ look. Do not let the dubbing creep up the body covering the quill.

15. When happy with the thorax gently push the fibres back and give a couple of nice tight whip finishes bedded in against the bead. I apply a little varnish to the thread just before whip finishing.

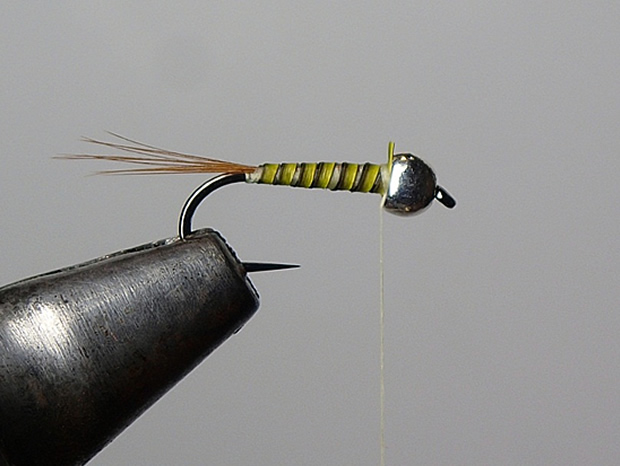
16. The finished fly.

17. A box full of shiny things.

Look out for these…
- Bulky tail area - keep turns down to a minimum when tying in the tail and quill.
- The quill snapping – can be very frustrating but take a deep breath undo thread and start again. Some soak the quills first to make them more pliable. Take a little extra care on the first turn once started there is no problem.
- Do not make the thorax too wide hence covering the quill, keeping the turns close to the bead should assure this.

Summary.
As mentioned before, this fly was first tied with murky and less than perfect water conditions in mind. I have had best success with this nymph in deeper water for grayling with short line ‘European techniques’ preferring my ever reliable copper beads for the shallow riffles and wild brownies.
I am going to stay quite specific with the materials this month as I feel the bright quill and silver bead set this fly apart from the hundreds of other drab quill nymphs out there.
For the same reason the bead size I have used may look slightly large in proportion to the hook, but I love this as it adds to the eye catching ‘shiny’ look.
So try it if you fancy a bold change of fly in your box to provoke some interest on the dour days. Don’t be afraid to ‘give ‘em some bling’.
Have a great month’s fishing.
You can contact Warren via email or call him on 07771 558 028.
