It’s a Fry Up ! ... Well this time of year it's what we hope anyway. I was at a local reservoir, Farmoor, about three weeks ago and there was a huge shoal of newly hatched fry near the boat dock. Newly hatched meaning this year’s fry. This means one thing. Fish food!
So with that in mind what are we going to present to the discerning trout then?. Well that leaves a huge can of, well, fry patterns to choose from. There are the old favourites like Peter Ross, Missionary, Baby Doll, Sinfoils Fry, Appetiser plus a myriad of others that have been, pardon the pun, spawned over the years. A couple that have, and still do, work for me are a simple perch fry and roach fry pattern. They consist of just five materials as listed below.
Fishing these patterns is great fun and gets that old ticker pumping waiting for the thud of a fry feeding trout, be it brown or rainbow. Fish them in the shoal of real fry or stalk fish that have been beating up shoals of fry and picking off the dead and injured. One thing you really do need to do is bump up the breaking strain of the leader and tippet purely to handle the way in which the trout attack the fly. As in hard! 5X or even 4X won’t cut the mustard. I would consider using 2 or even 1X materials. Today’s modern tippet materials give high breaking strains with low diameters perfect for presentation without compromising the strength of the tippet. And losing fish is not the name of the game after all.
So here is the method I use to tie these simple and effective patterns.
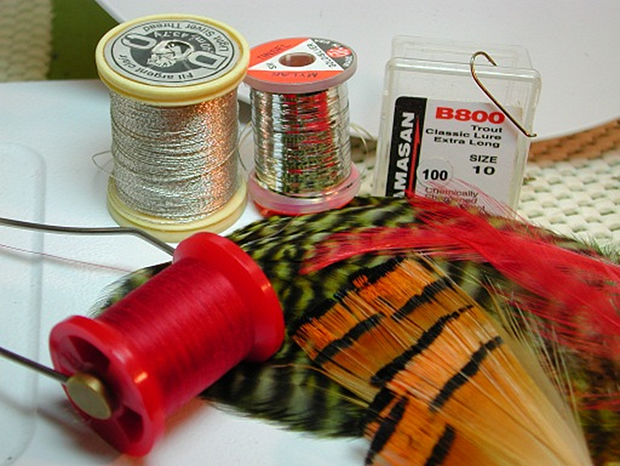
Thread: Sparton Pro Red
Hook: Kamasan B800 #10 or #8
Tail: Golden Pheasant Tippets
Rib: DMC Silver Thread. (More on why later)
Body: UTC Mylar Tinsel Silver
Throat Hackle: Red Hackle fibres
Wing: Olive dyed Grizzle Hen Hackle
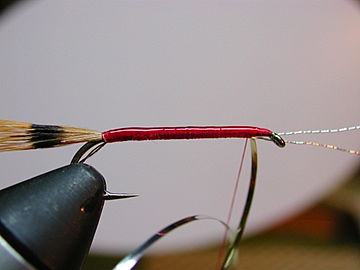
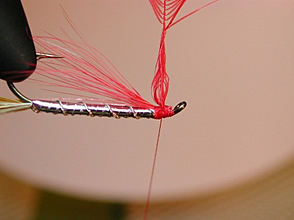
So pop the B800 of choice (this is a #10) in the vice and run the thread on to the shank down to the bend. One thing some folks struggle with is getting a neat under body of thread. Leave a tag of thread that is a couple of inches long and angle it at about 45 degrees. Each turn of thread slides down the tag and butts up to the previous turn.
Now we will tie in the tail. This is another job some folk struggle with. The picture left shows a common (albeit exaggerated) fault. The tail fibres have slipped around the bend and if left there would make the fly spin. Picture right is my preference.
To continue creating a nice under body we need to trim the waste feather material. I tend to use the angle, roughly, of the eye of the hook...
Finish the thread wraps and we will then tie in the rib. I said earlier there would be more on the rib material I use here. It’s a DMC thread from the good old sewing shops and available in a myriad of colours, I use silver and gold in the main. It’s a three ply material and as such gives us three ribs in one. Take out one ply and you have a medium tinsel. The single is nice fine tinsel and the three together is a large tinsel. If you twist them as you wind them up the body the rib stands out even more.
The next stage is tying in the body of the fly. I have used a mylar tinsel. Its two colour, silver and gold and needs tying in in a specific way. To get the silver side of the tinsel showing on the completed fly we need to tie in the tinsel with the gold side showing uppermost
I have decided on a medium sized rib by removing one of the threads ply.
My next stage is to varnish the thread wraps and wind the tinsel whilst the varnish is still wet.
You will see the tinsel is at the head of the fly.
I wind it down to the bend of the hook and then apply more varnish and wind it back up to the eye.
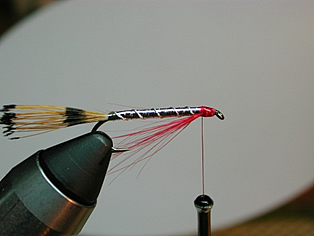
Wind the rib.
Trim away the waste rib and body materials and we will put in a sparse beard hackle.

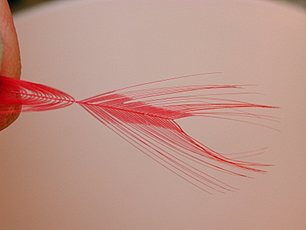
I prepare and tie in the feather as in the following pictures: Nip out the tip and pull back the fibres to create a tie in point.
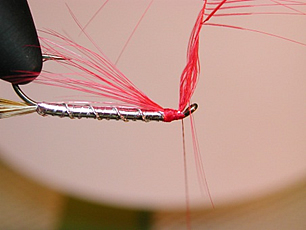
Tie in the feather with a couple of loose wraps of thread.
Now I pull the feather back towards the bend and tie it down so.
What it does is prevent loose fibres of feather pointing out over the front of the eye and becoming a nightmare to remove.
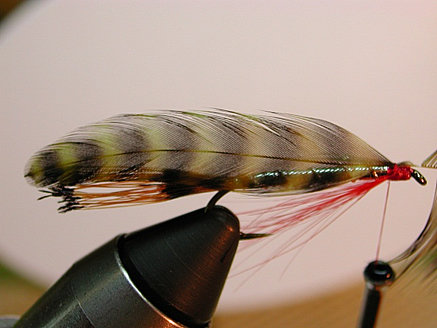
Next we need to select a set of feathers for the fly in this case a perch pattern. The feathers I am using here are from a Whiting Grab bag. The bags are a great way to get decent quality hackle without a huge outlay. They are absolutely perfect for this kind of fly pattern.
What I am looking to do is get the feather just touching the end of the tail.
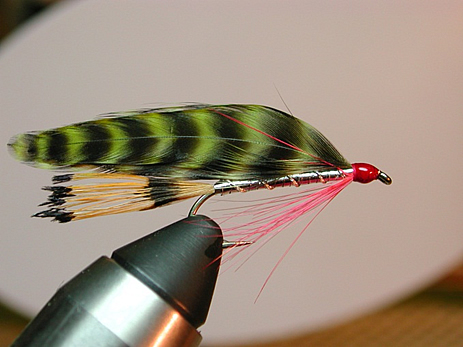
And here is the fly with, in this case four, feathers tied in and head finished.
The head is purposely large to act as another target for the trout.
I said that I tie this as a roach fry too and the only substitution I make is to us just two grey feathers dyed or natural to complete the fly instead of the olive dyed grizzle.
Why not give them a shot and let us know here if they work for you. It certainly does for me.
Tight lines KP.
