So here it is, THE step by step of the Klinkhammer Special given to us by Hans van Klinken. Have your vices at the ready!
THE TYING TECHNIQUE
(Step by step photographs: Rudy van Duijnhoven)
(For the CS54 it is necessary to reshape the hook between thumb and forefinger. Place the hook in the vice and wrap the entire shank with the tying thread. This avoids the difficulty of a slipping wing when the fly is finished.)
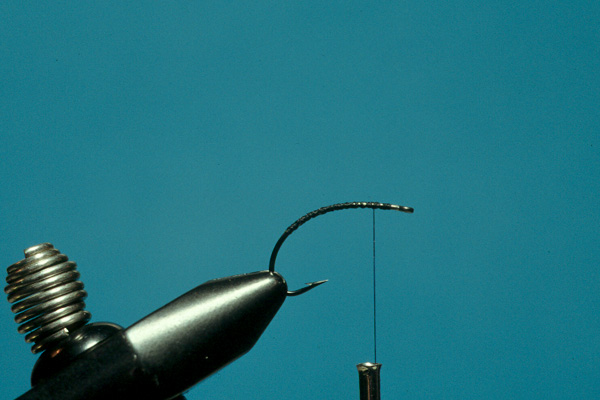
Cut off a strand of poly-yarn and taper the tip with your scissors before tying in; this is to be sure the underbody will be as slim as possible. Secure the yarn onto the top of the hook shank with the thread at the position shown.
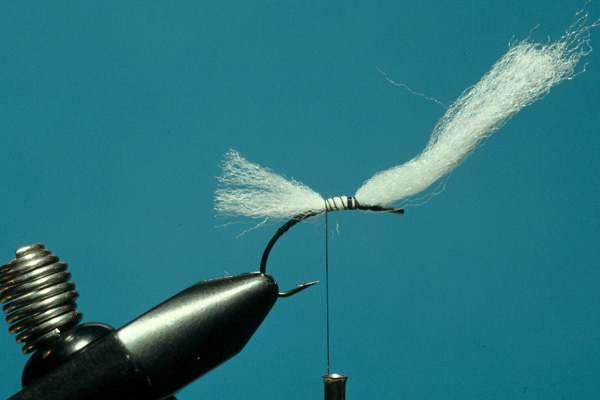
Wrapping your thread down to the bend and backwards.
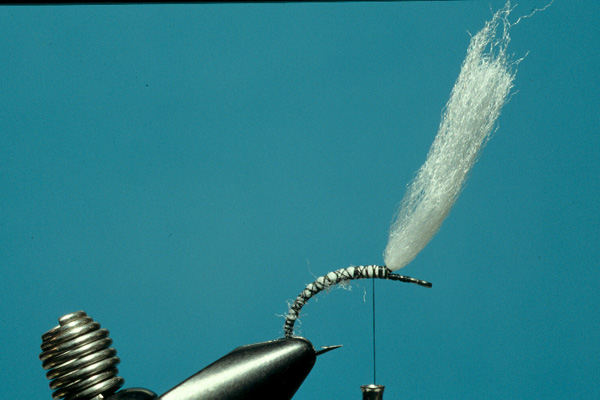
Try to make a nice tapered under body. I like a slim and well-tapered under body. Be very critical in this stage! The better the under body the more beautiful the completed fly.
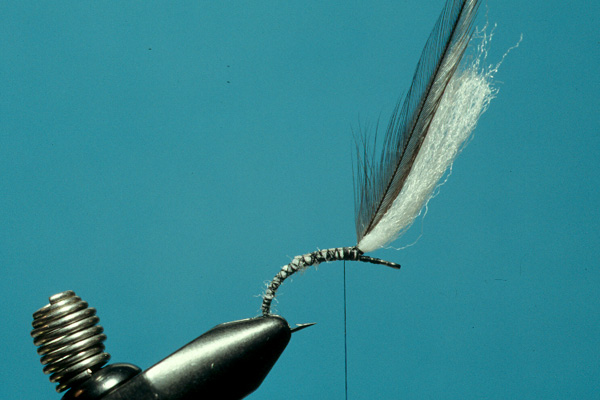
Tie in the hackle so it lies in the same orientation as the yarn. Form an upright wing by tying up the yarn and hackle. This is to be sure you have no problems with the hackle in the other tying steps.
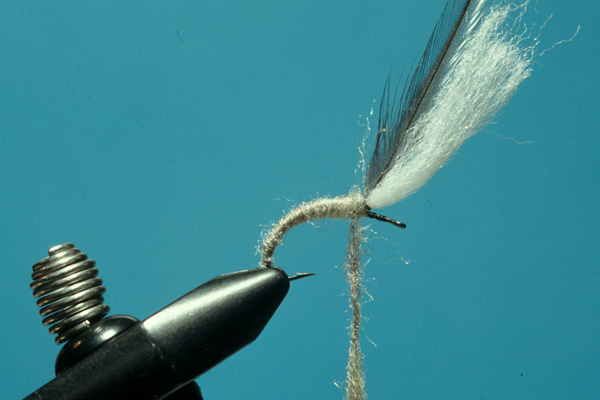
Apply a small amount of dubbing to the thread. Take as much dubbing just to cover the under body. Tie the body very slim and well tapered. Start as close to the barb as possible. The thinner the body the more successful the pattern. Wind it along the shank and stop just behind the wing and cut off surplus poly or use the last piece of dubbing as underground for the thorax. In that situation it is not really necessary to cut off surplus. I recommend trying both techniques because for some people it is much easier to produce a better-looking thorax when you have made an under body.
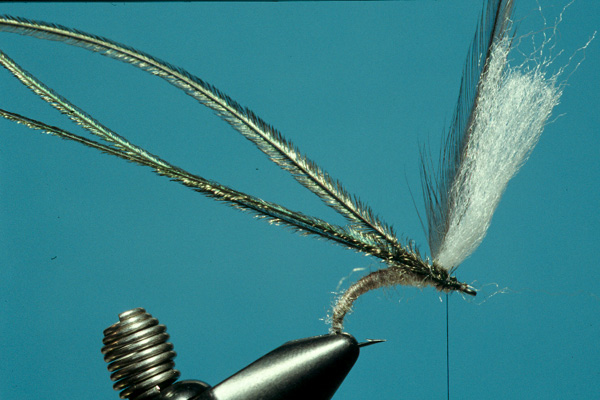
Tie in three peacock herl fibres. You can also tie the strands in at their tips, this will help you to create a much nicer thorax. I secure the strands well also behind the wing. This provides that the thorax will come off.
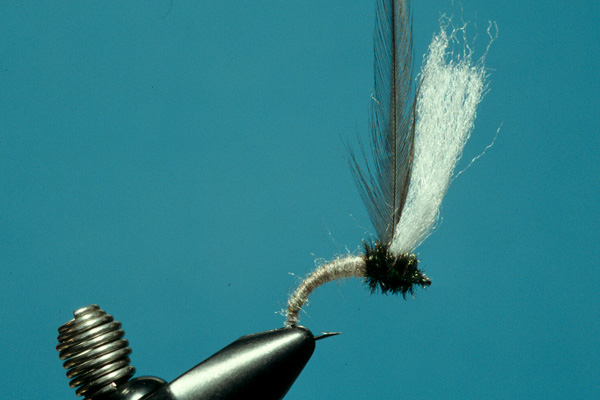
TIE OFF and varnish.
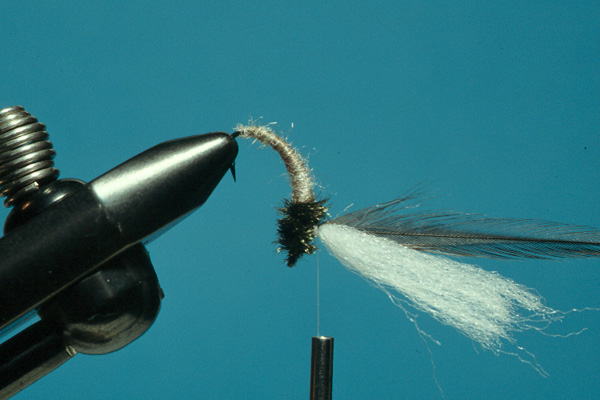
TAKE YOUR BOBBIN WITH SPIDERWEB!!!!
Now turn the hook in the vice, so that the wing is horizontal, with the bend uppermost. Grasping the tuft of poly-yarn, put on the spiderweb, wind several turns around the base of the poly-yarn and create a rigid wing base on which to wind the hackle.
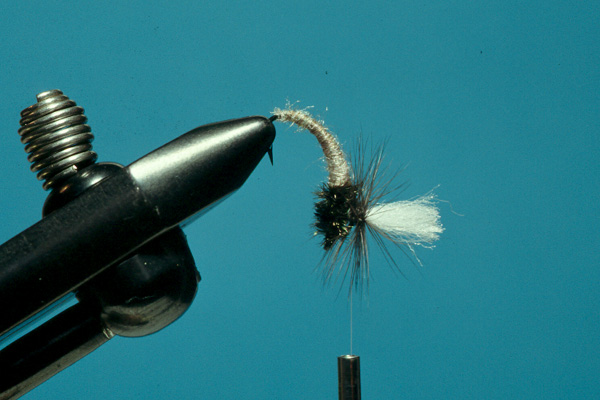
Wind the hackle around the base. Start at the top of your wing base, taking each successive turn closer to the hook shank. Take as many turns as the type of hook requires. Small flies about 5 windings and bigger flies at least 7 or 8 windings. Remember that the fly has to float mainly on the parachute. A lot of people wind their hackle in the opposite way, working up the wing, the hackle is less durable and may still come off. When you work from top downwards it ensures a compact well-compressed hackle and a most durable construction. Pulling the hackle tip to the opposite direction as the wing and secure with a few turns of spiderweb. Secure well around the base of the wing between the wound hackle and body. Using your whip finisher. Trim away the waste hackle tip and hackle fibres that are pointed down. Take your varnish applicator and apply some lacquer on the windings just under the parachute.
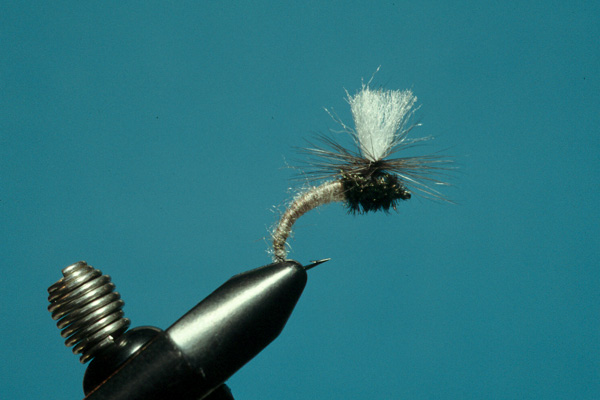
The completed fly
The real thoughts behind the Klinkhåmer
I think before tying a Klinkhåmer people should know the real thoughts behind my pattern. Although my first own variations from the Racklehanen did extremely well I wasn’t really satisfied with them. The reason was simple! At that time I didn’t know Kenneth Boström who designed the fly and I made some essential tying mistakes because I never had seen the proper tying techniques. Those mistakes prevent the fly from floating the way Kenneth invented it. My copies landed not always as they should be and for some people a fly like that will be seen as a big failure or just an unsuitable pattern. I was lucky to fish the original fly at the first place so I know it has to be my own mistakes and I did my research and found the source. I had tied them with a single and much longer wing and sometimes they float in a wing-flat position through which they lost most of their effect. I also used too much floatant and in a wrong way as well. Fish rose for it like crazy but I simply missed too many takes. I probably landed only 3 out of 10 takes. To solve the problem I just add a hackle around the wing as I had seen it in the book by Eric Leiser and my first parachute pattern became a fact. After this improvement the flies floated as I wanted but it was not the only reason why I stayed with parachutes. Around the same time I discovered that flies that floated in the surface produced much more fish then patterns that were drifting on the surface. I also made another discovery and that probably was one of my biggest discoveries in my fly fishing so far. It was the Lady of the Stream that brought it to my attention. At that time I still used shoulder hackle flies a lot and I tied many with a nice strong tail and solid hackle. I like the way they floated high on the surface and I could see the flies very well. I loved it to see how the grayling came up for them but then on that certain day when I presented my fly not far out I saw how the fly has been pushed beside quite often by an aggressive taking grayling. I gave it a closer look and I frequently saw how they push it up and sideward.
Today I know a lot more about the grayling, her biotope and feeding behaviour. Most of the time she will feed on the bottom and she is built for it. For me this is the reason why I missed so many fish with shoulder hackle flies. Grayling can come up at very high speeds to take flies from the surface film, but because of her protruding upper lips, she is actually is a perfect bottom feeder. Those lips are ideal to pick up snails and larva from the bottom. Still the grayling found a beautiful way to rise to floating and emerging insects. Sometimes they even jump out of the water and take their prey from above. I have seen it hundreds of times. Concerning dry fly fishing I believe that it is a combination of the shape of her mouth, the speed of rise and way of taking the fly, which is responsible for the sliding away high floating surface flies at the moment of taking. This problem reduces enormously with parachute flies and even more with deep surface hanging emergers. I proved my theory right many times after the invention of the Klinkhåmer. The iceberg shape solved the problem and eight out of ten fish are always hooked well in their upper lip.
Why fish IN the surface?
Fly fishing with parachutes has many benefits. It already starts with the presentation. A well-tied parachute fly doesn’t land only perfectly on the surface but also floats well the entire drift. In my personal opinion it is one of the most stable flies and with a good knowledge about fly tying materials you can use them in riffles and strong currents without any problems. The idea of a parachute fly is to present it in the surface that gives it also a better appearance to imitate insects and creates a wonderful silhouette as well. Maybe another reason why we usually have better results with parachute flies. When we try to imitate insects only a few points seems to be important. We look at the size, the shape, the colour and the mobility but I guess there are still some more points of interest. I still search for them every day. Several years ago I started to think different and when I hold my classes and workshop today I tell and explain to people about the silhouette a fly can produce. I don’t mention the shape anymore. I just try to look and see it in a different way. Wind can improve mobility and we already include it in our tying but how many people realise the effect from the sun on the fly in the water. I know it is important and it even has a great influence on patterns like spiders. I also have no other explanation why some selective fish take a fly when the sun sets or rises or just disappear behind a cloud.
For more information please visit Hans Klinkens website