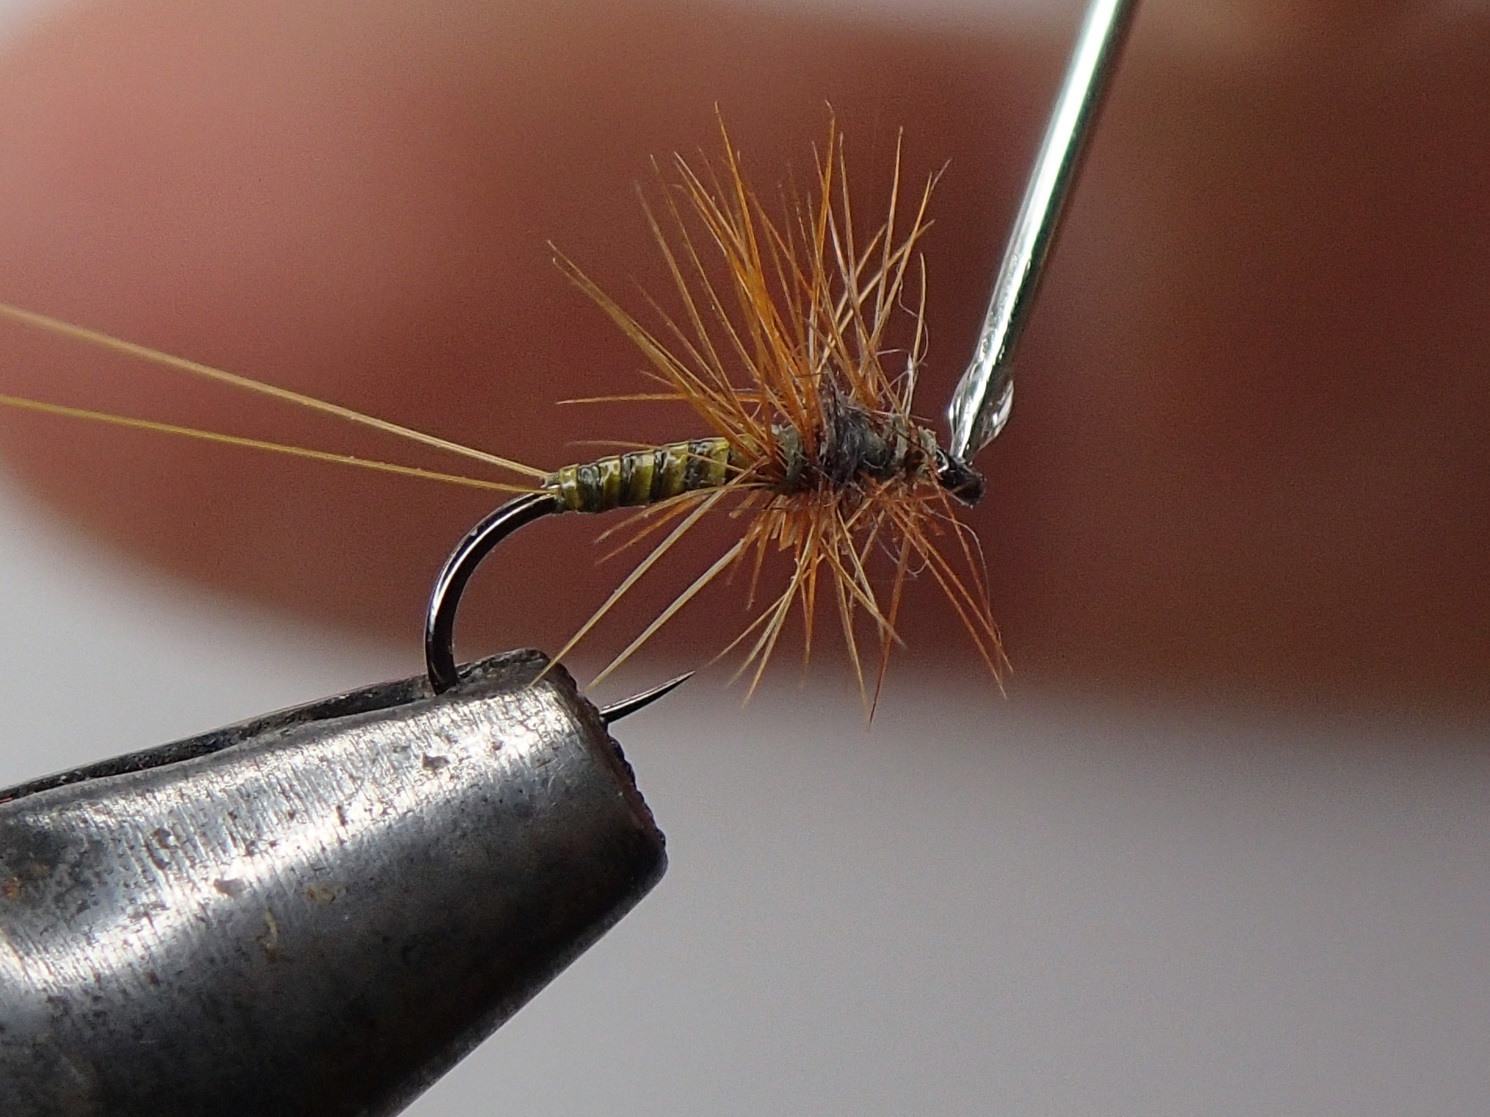
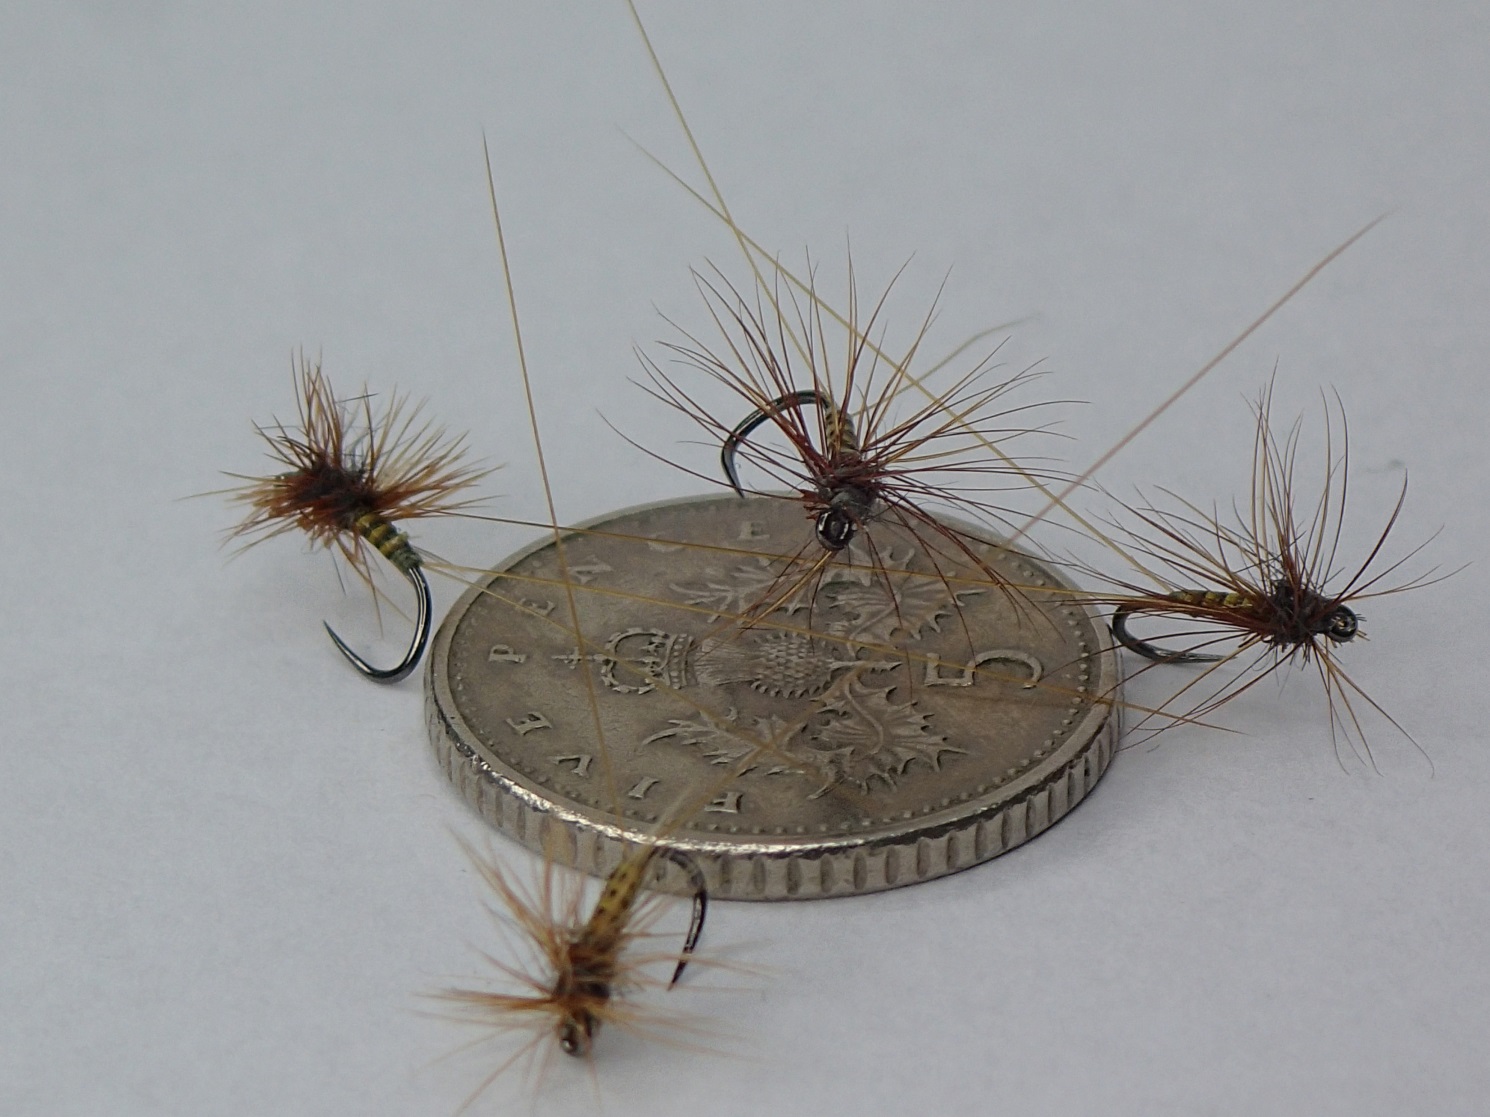
#20 Olive Dun. A smaller than average dry fly this month and one which takes inspiration from the dedicated ‘small fly' websites. Although a size 20 is hardly small compared with the miniscule flies some tie it certainly is as small as I need to go for almost all my fishing. I love all the materials used in this pattern, the natural materials and colours produce a fly which to me, looks and feels right both in and out of the water.
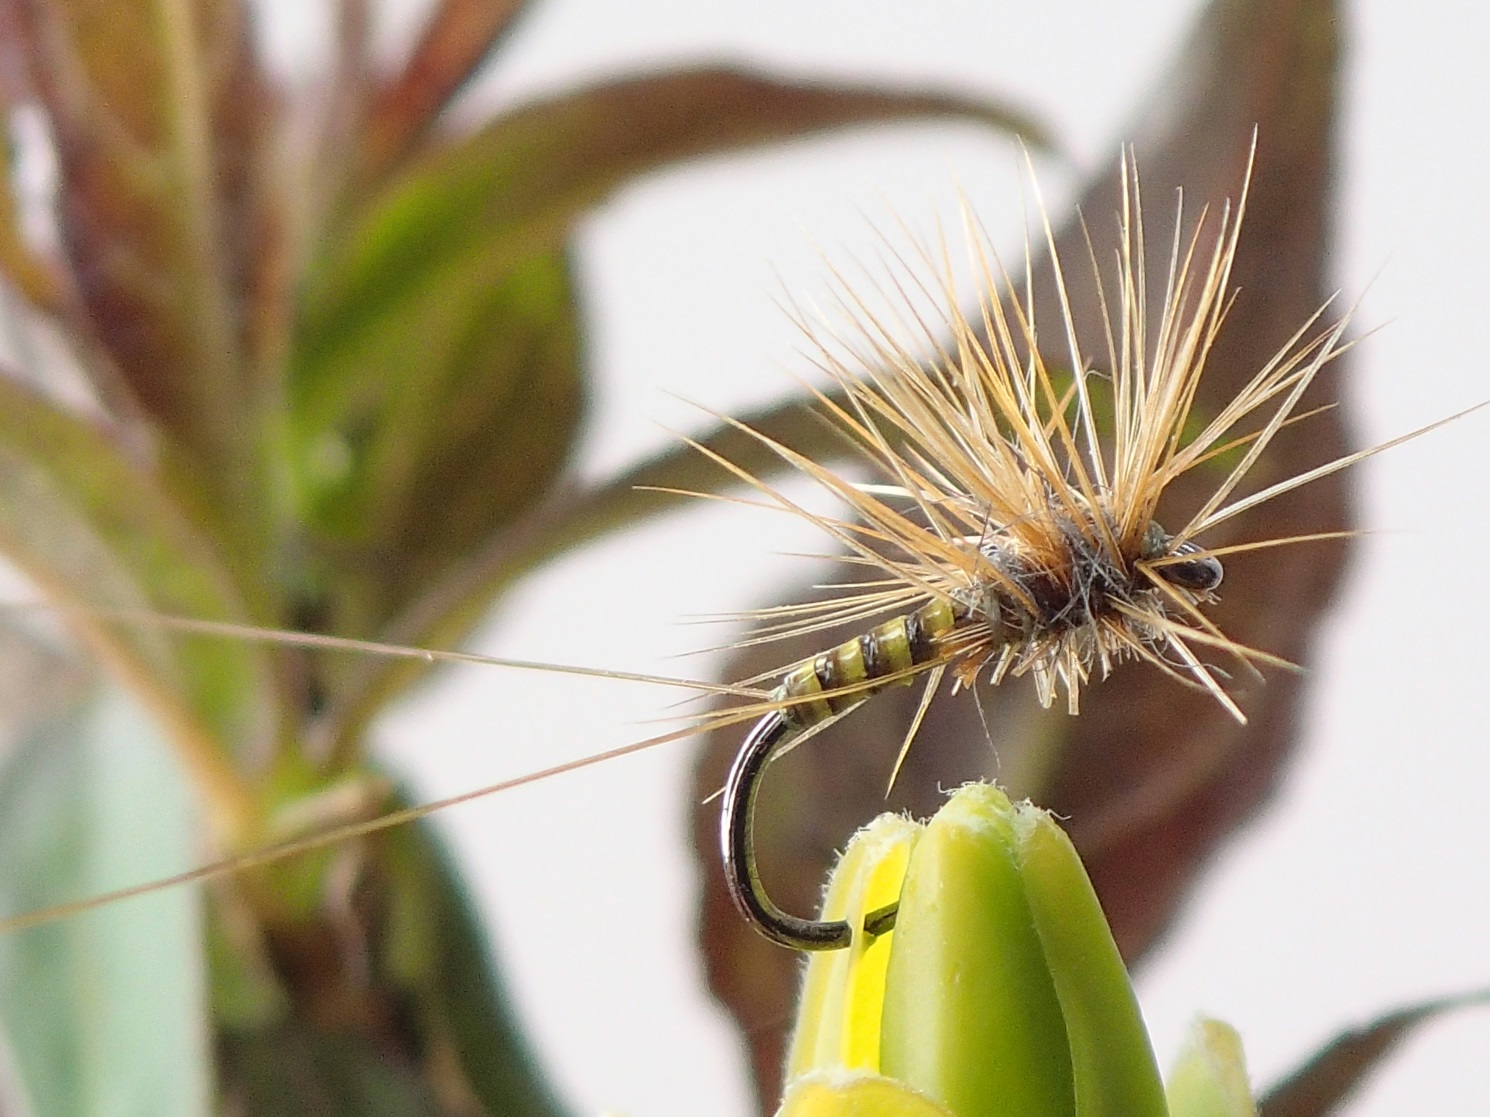
I have been tying duns with quill bodies and long split tails for a while, my patterns having the popular CDC wing with a hackle. But once I started to drop out of my comfort zone into a #20 and even smaller I started to use a thorax/hackle that I had come across whilst reading Andy Baird's excellent ‘small fly funk’ website. Andy used a mole fur thorax with his hackle in his ‘generic olive’, which when I tried looked great. By doing away with the wing the tie was simplified. Less materials equalled less turns of thread and therefore less bulk, essential in smaller flies.
The extented tail is without doubt a trigger point, much has been written on the subject and I for one have been converted to the silhouette this type of pattern creates.
Material choice is especially important to me with with this pattern.
The hook is always down to personal preference but to me the Partridge hook is a ‘proper’ size 20. I also go a bit smaller with the Tiemco 103bl #21. But I have to confess to using the Flytying Boutique dry fly light hook (which is essentially the same as the Tiemco but cheaper) more and more these days.
Although a #20 is by no means miniscule, the size still creates problems with the tricky tail and making sure there is no excessive thread build up throughout the tie. The excellent veevus thread has great strength for its diameter which certainly helps.
Yes I am afraid it's another fly with a Polish quill body, but I’m quite honestly struggling to find anything that looks as good in this sort of ‘natural’ pattern.
I find most capes have a fair few tiny hackles at the base which are fine for a #20. Finally, not much to be said about the mole fur except don’t overdo it.
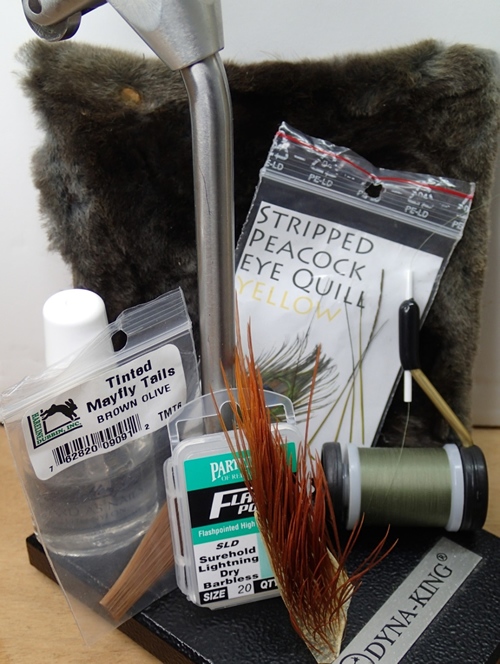
Materials
Hook - Partridge SLD #20 or Flytying Boutique Dry Fly Light #20
Thread - Veevus 16/0 AO5 Olive
Tail - Tan Microfibbets
Body - Polish Quill Yellow
Thorax - Mole Fur
Hackle - Cock Cape - BrownTying
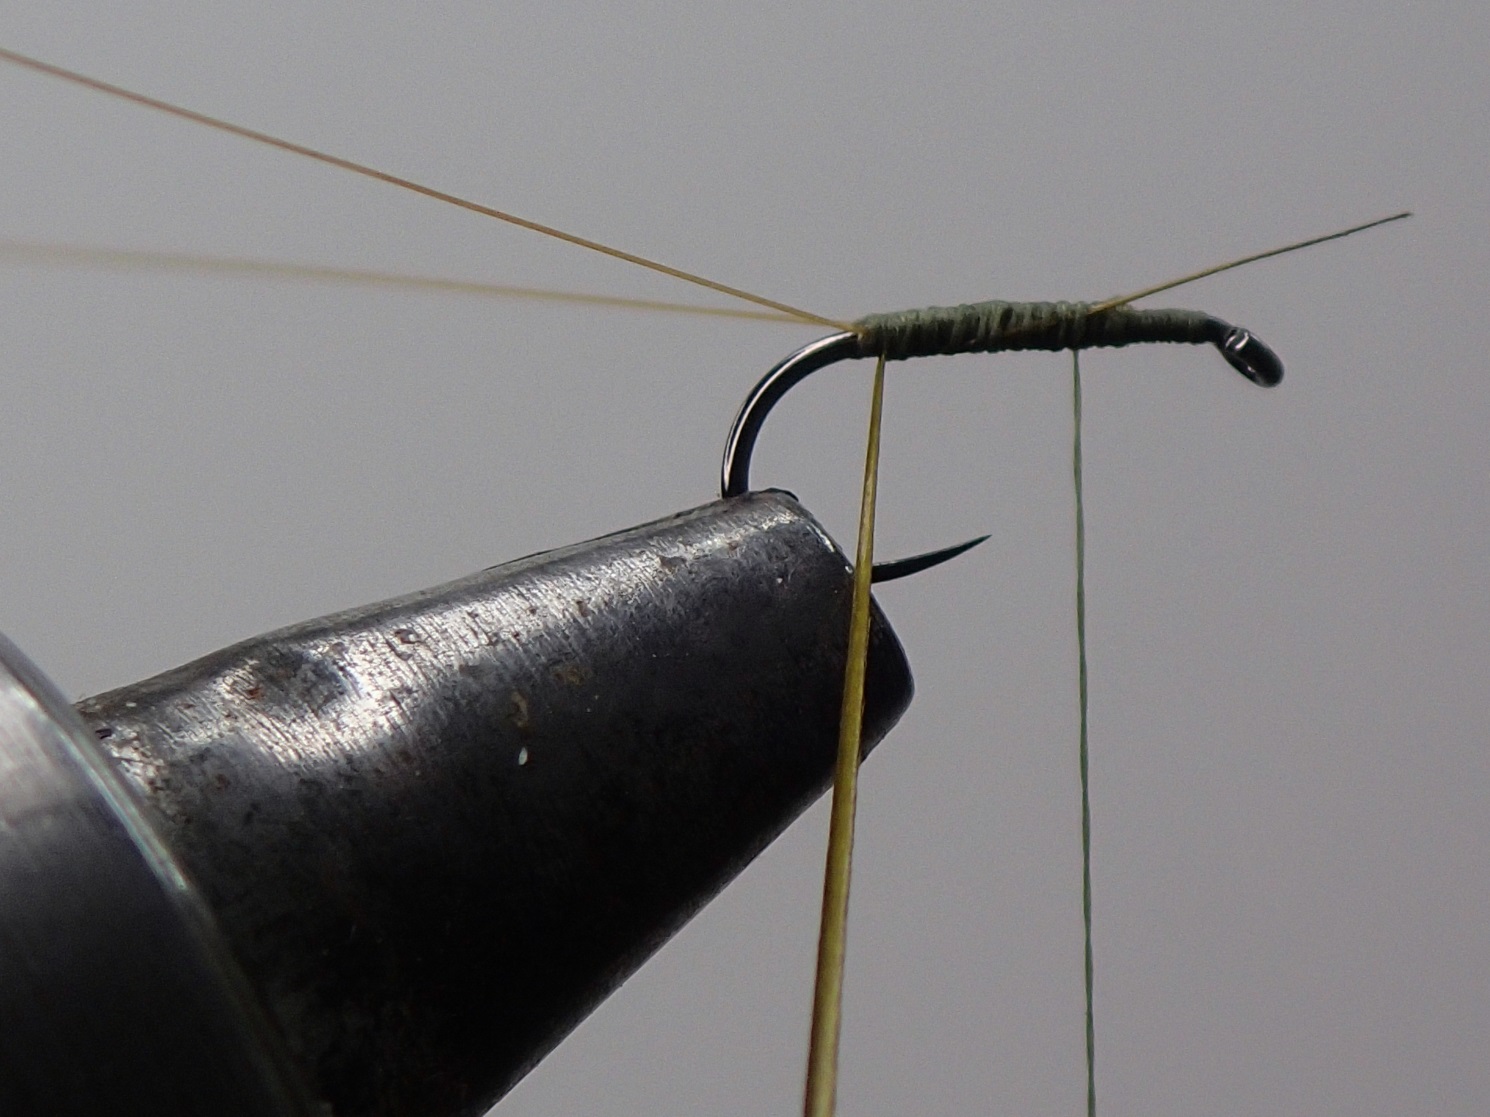
- Vice up your hook and catch in the thread.
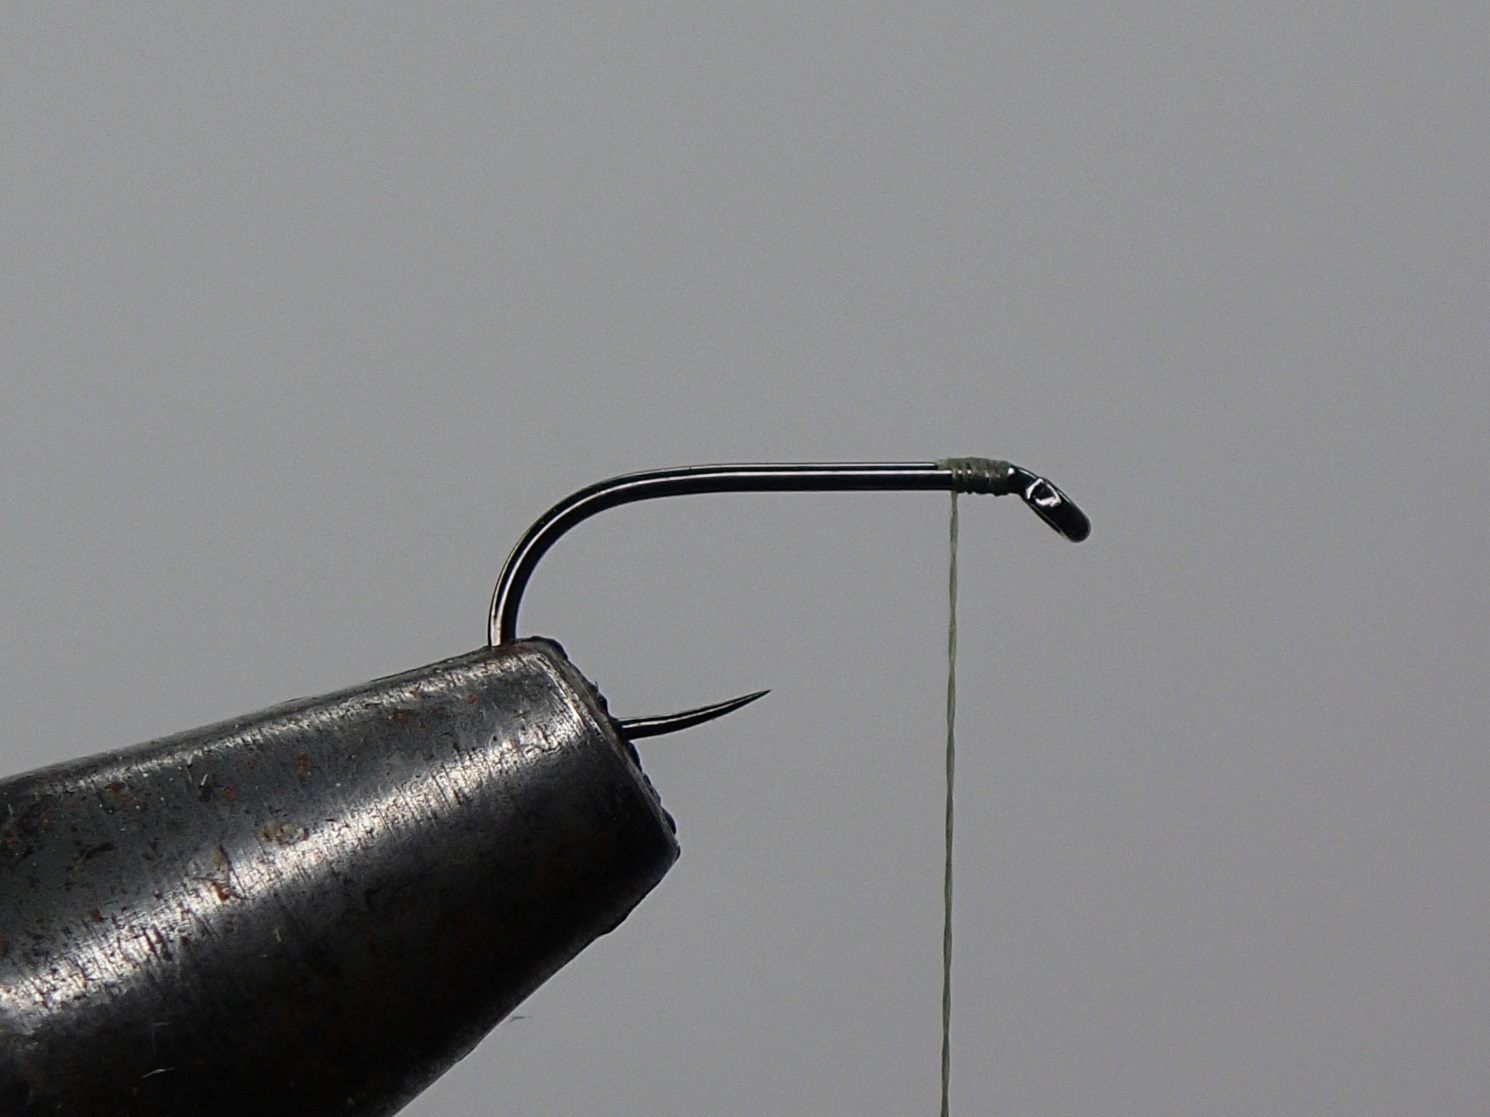
- Carefully wind down the shank with touching turns until in line with the point.
- Now carefully separate two microfibbets and lay together so as the tips align and then lay on the shank leaving the tail at least twice the length of the hook shank. Carefully catch in the microfibbets with your thread and wind down until just short of the bend. Make sure the microfibbets remain on top of the shank.

- Follow the same procedure to split the tails as described in detail in my June ESF article 'Olive Variant'
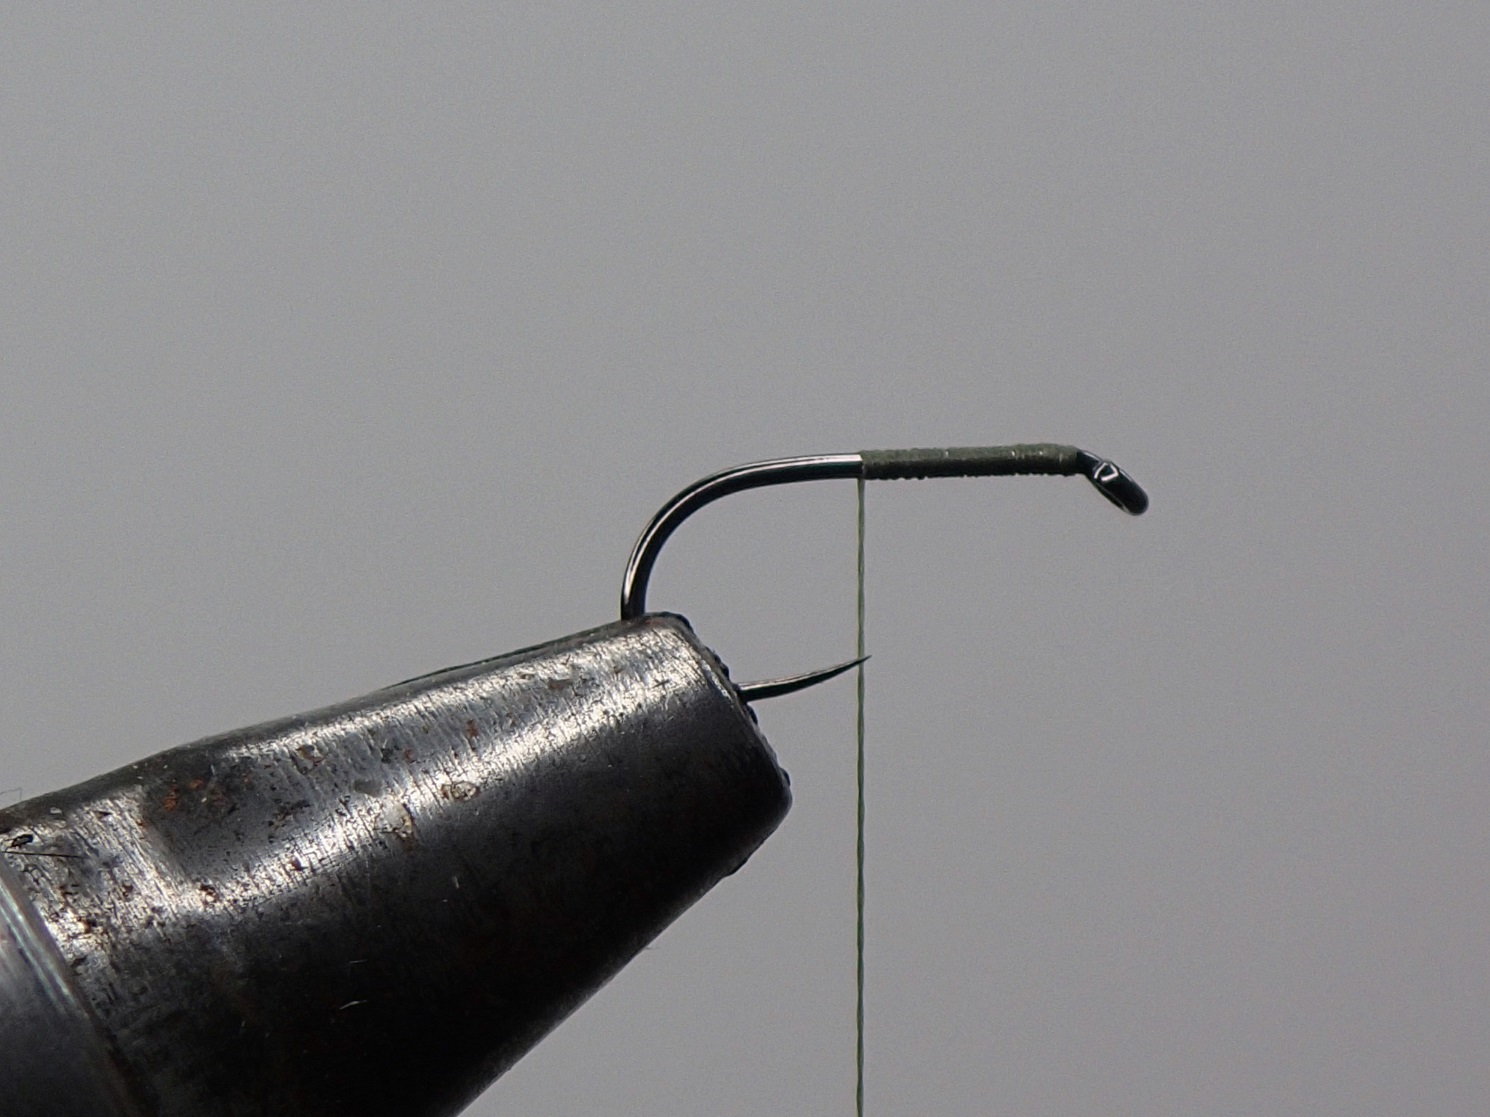
With the waste trimmed and covered the thread should be left just short of the eye.
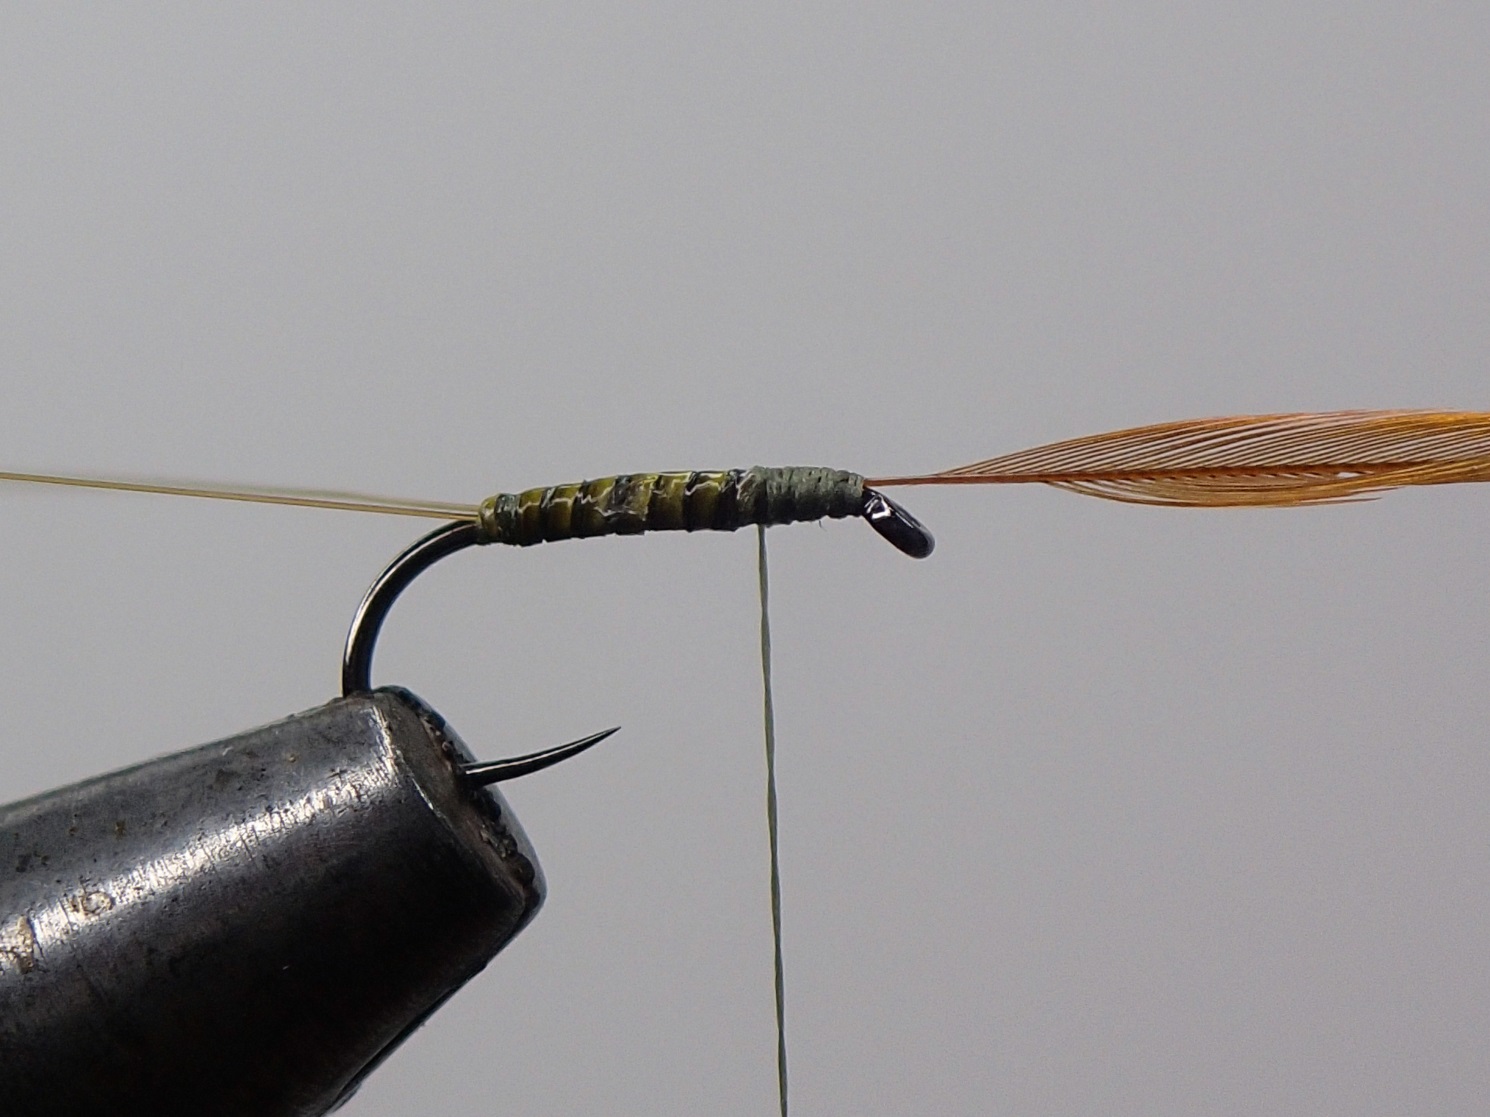
- Wind the thread back down to the bend where the microfibbets split. Select a quill and carefully catch in, then wind your thread back up covering the waste quill finish three quarters of the way up the shank and trim off waste quill.
- Now using your hackle pliers carefully wind your quill up the shank to form the body, tie off three quarters of the way up the shank leaving enough space for your hackle.I now use a couple of whip finishes to hold the body in place for varnishing. DO NOT cut the thread.
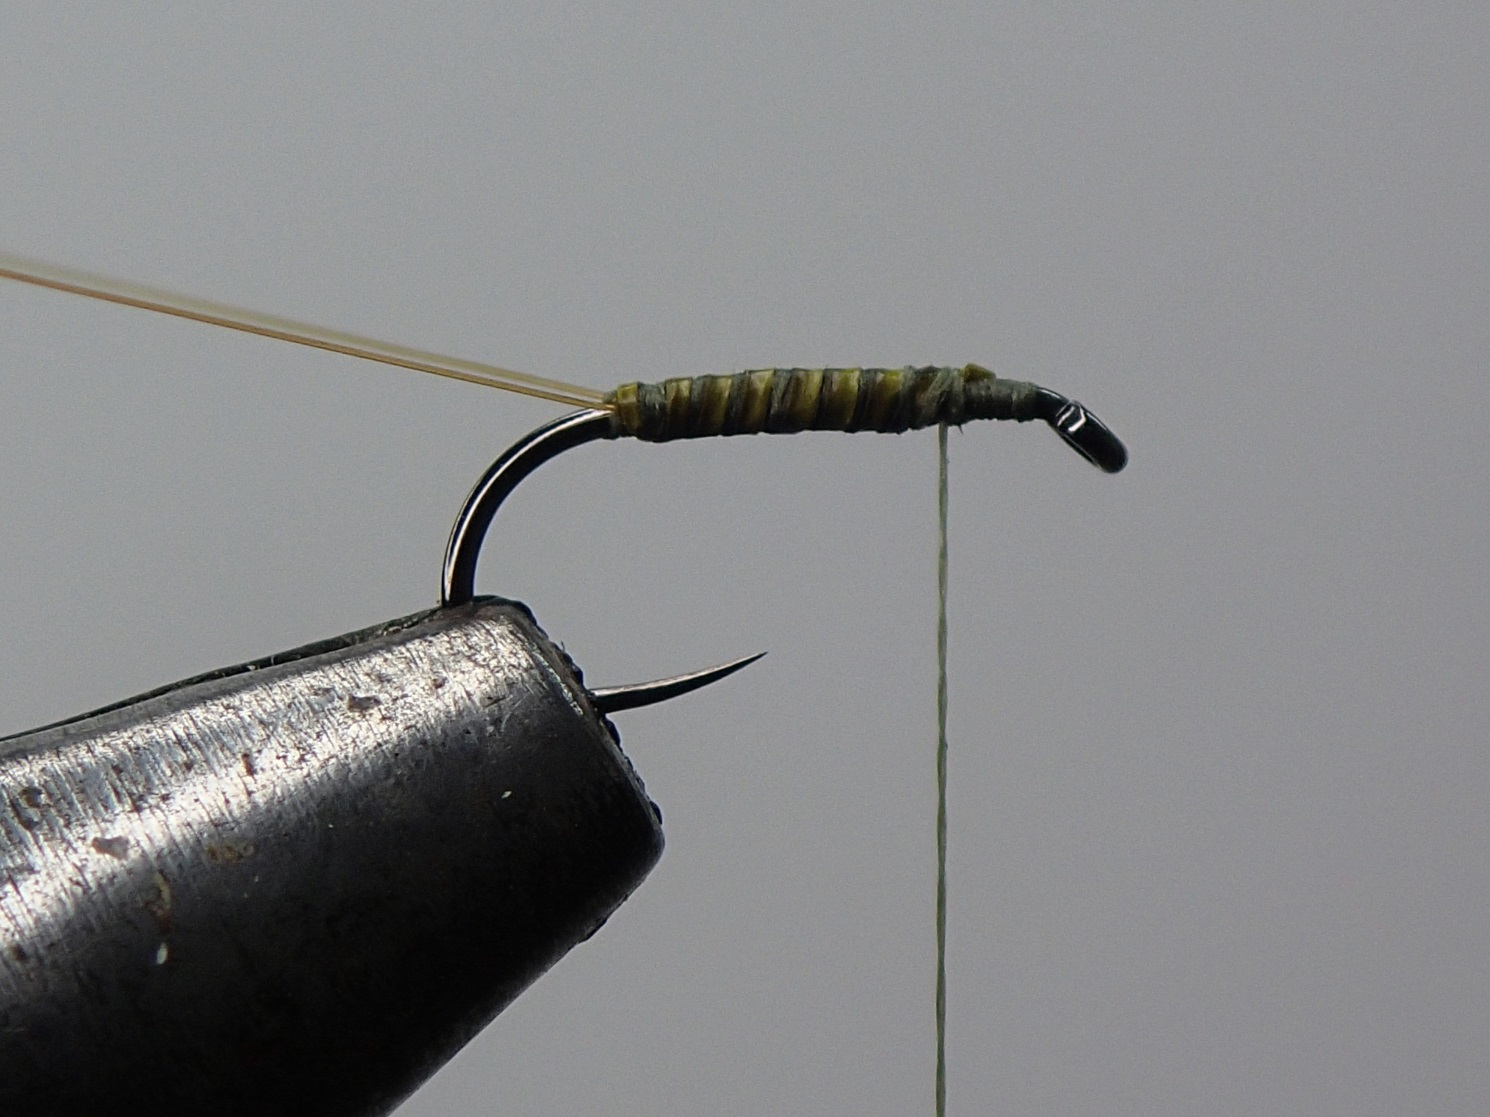
- The quill, as always, needs varnish to offer protection and to bring out the colours. For such a small body I use a sewing needle to apply a very fine coat of 'Hard As Nails’.
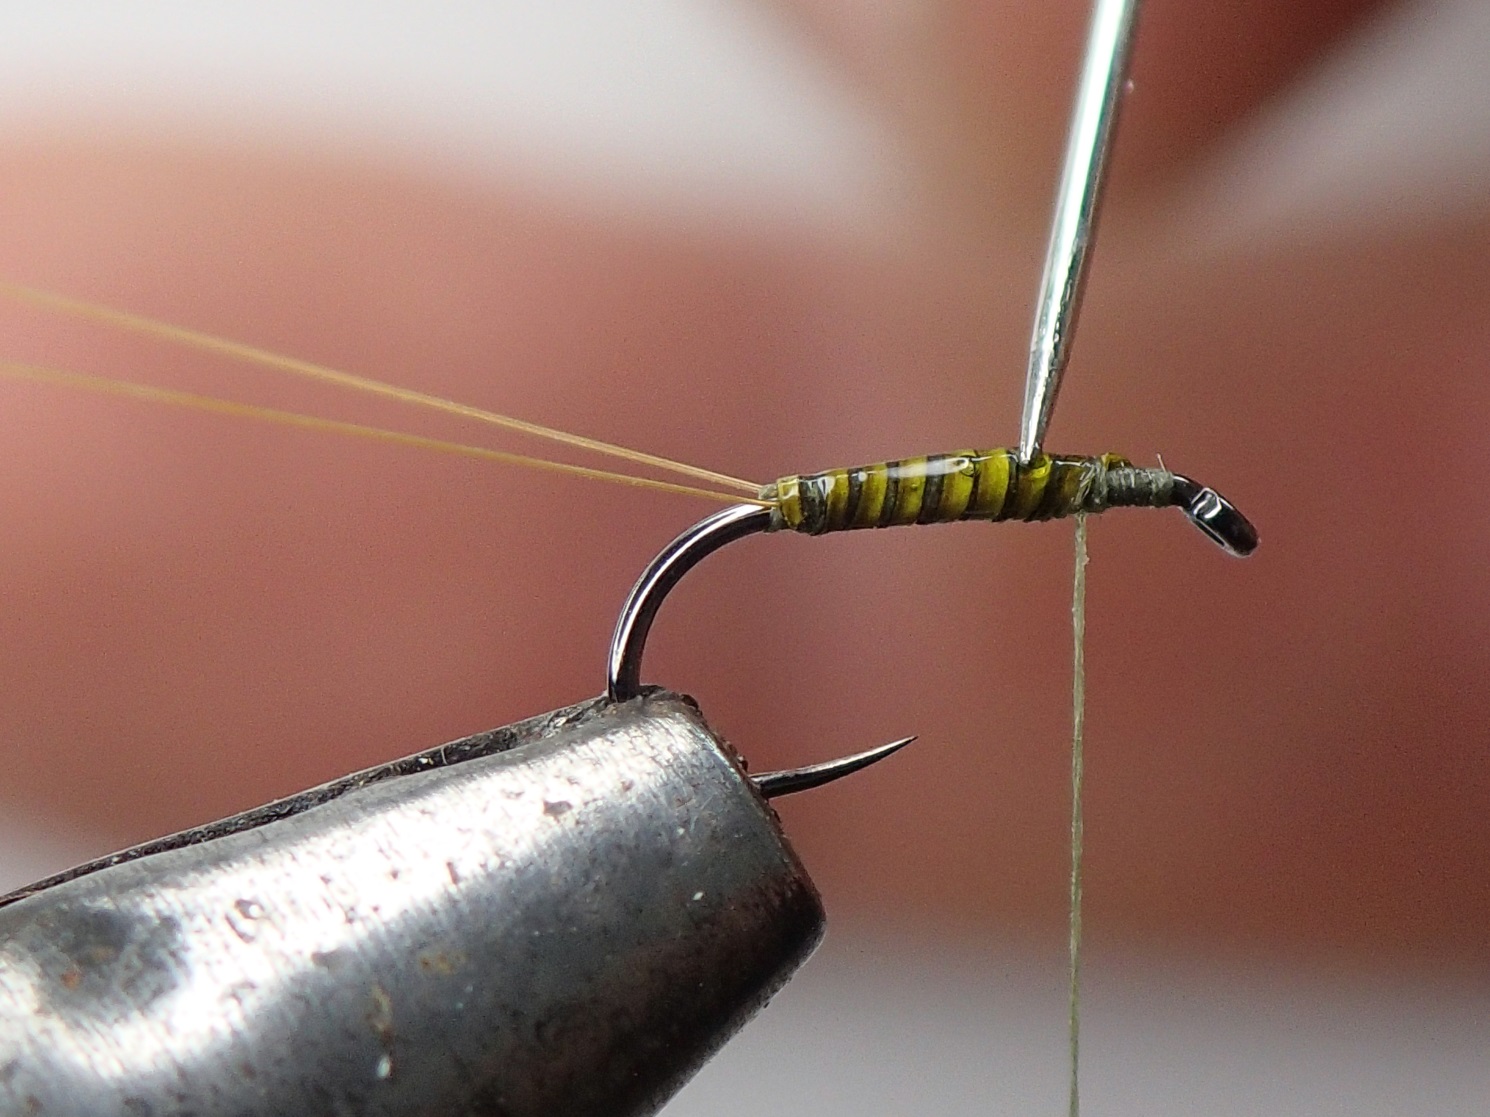
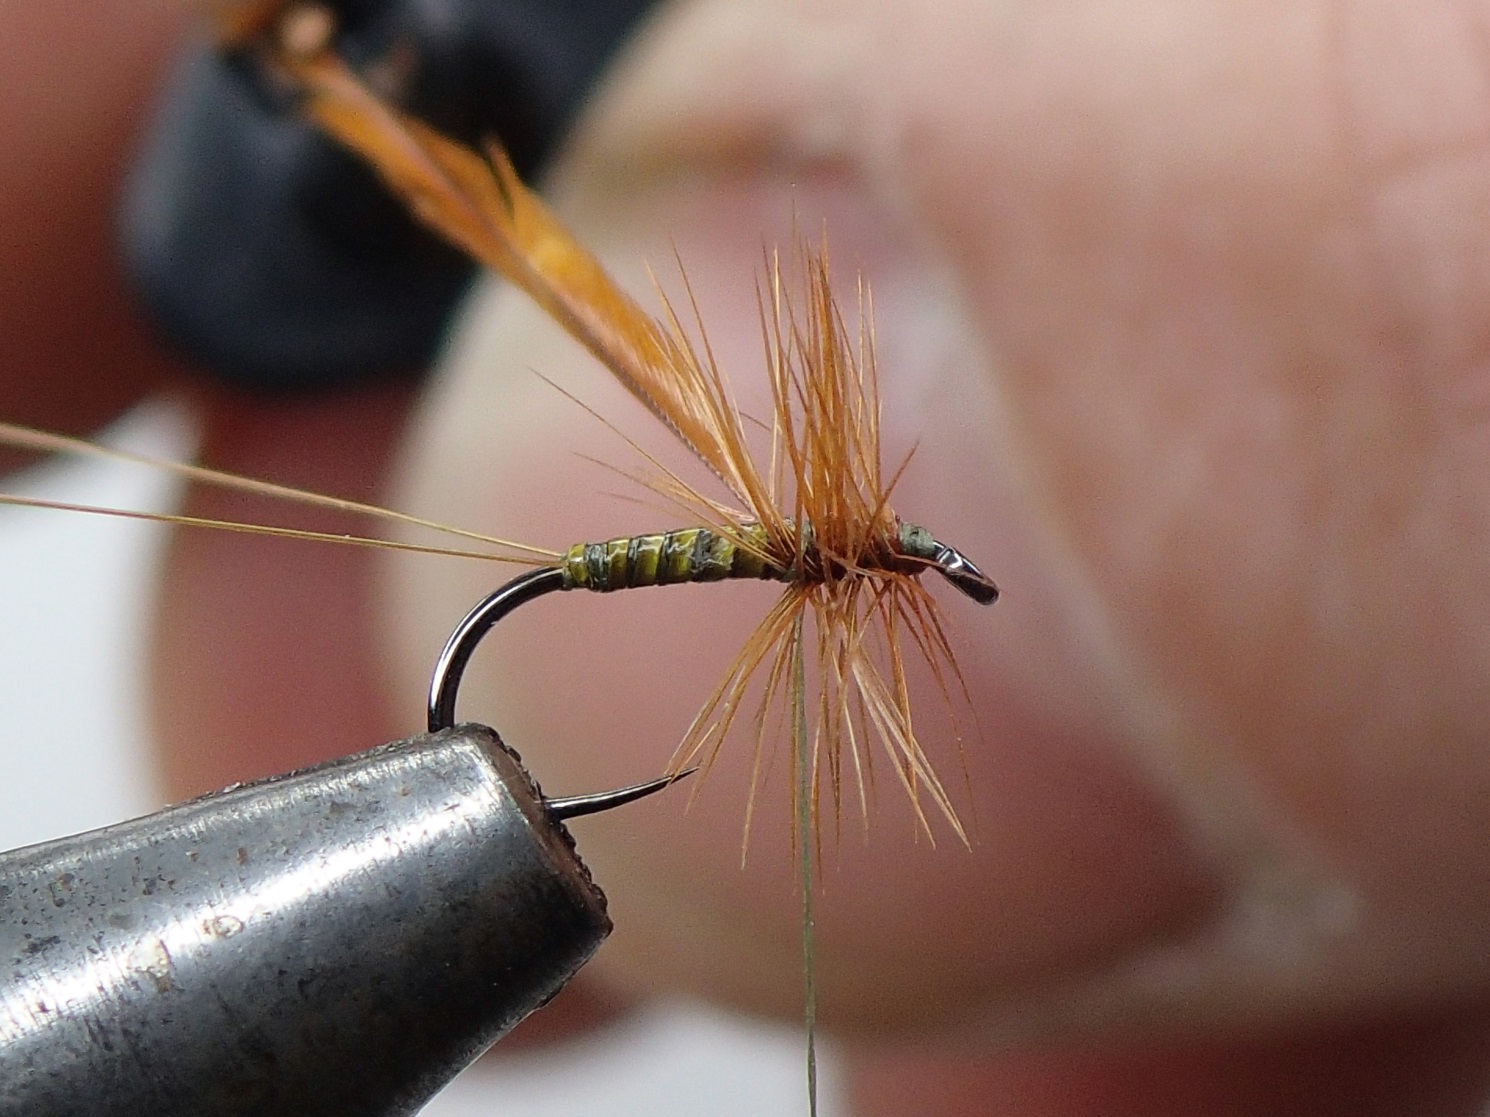
- While the varnish is drying select a small hackle. Take a bit of time and care: the individual fibres should be, if possible, no longer than the length of the body.

- Catch in the hackle with the stem towards the bend, give a couple of turns of thread then trim off waste. Continue to wind the thread up to the body covering the waste and tidying up.
Catch in.
Trim waste and tidy up.
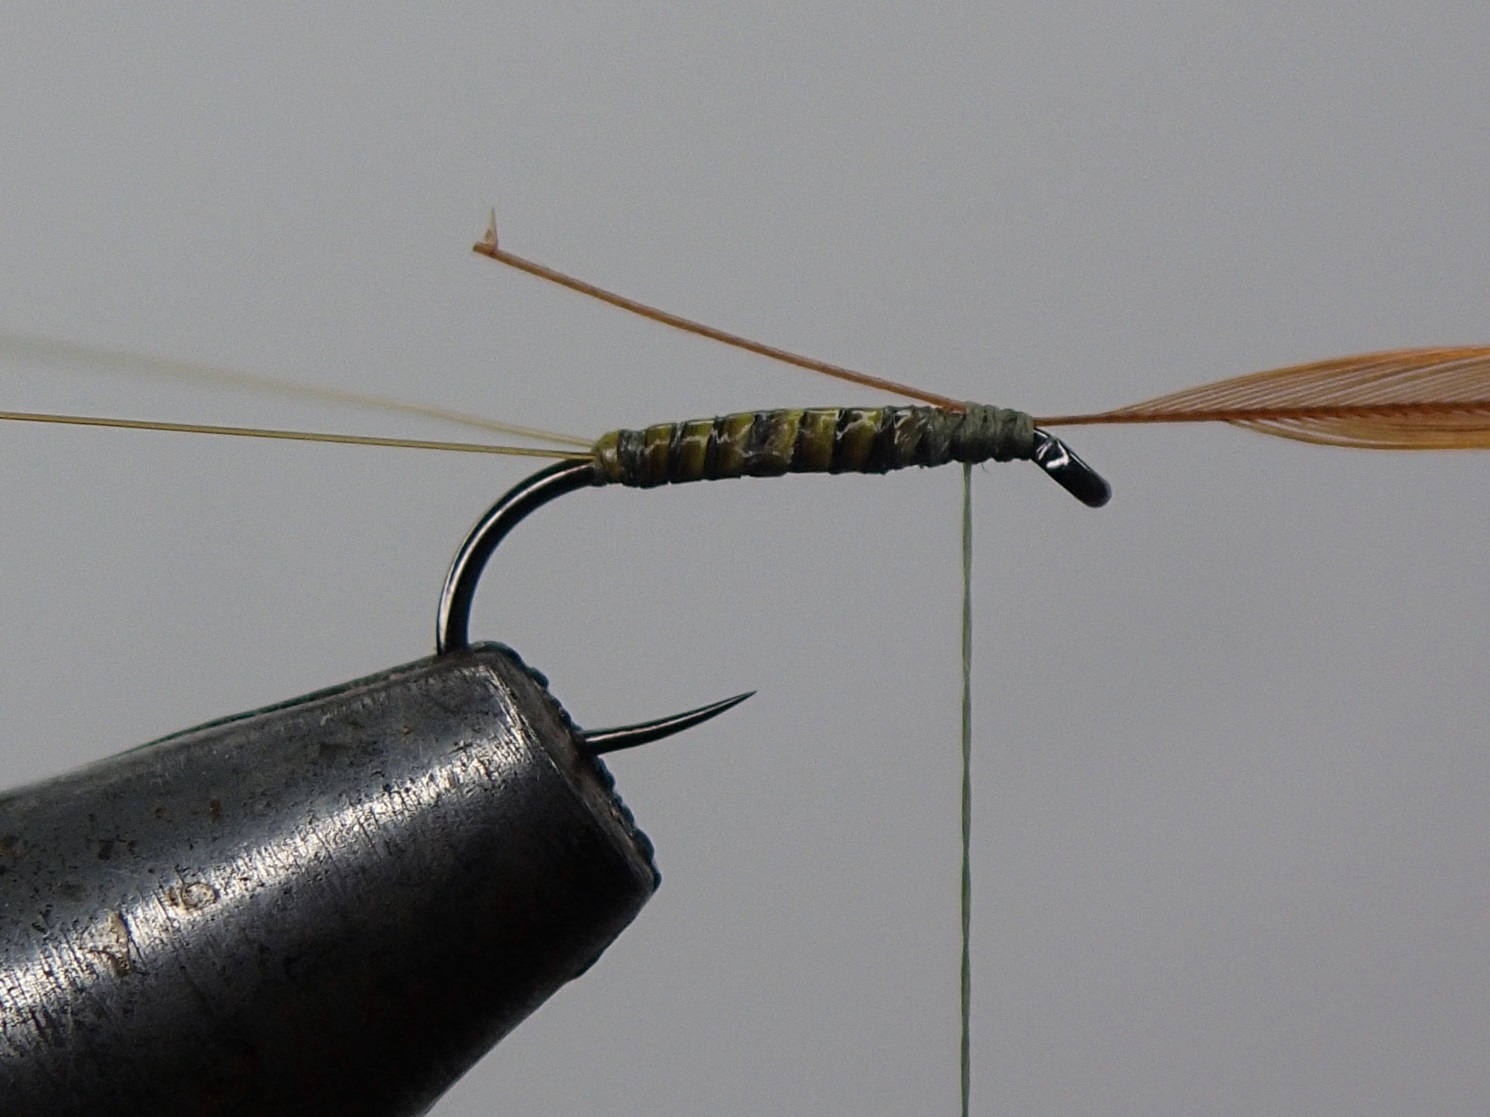
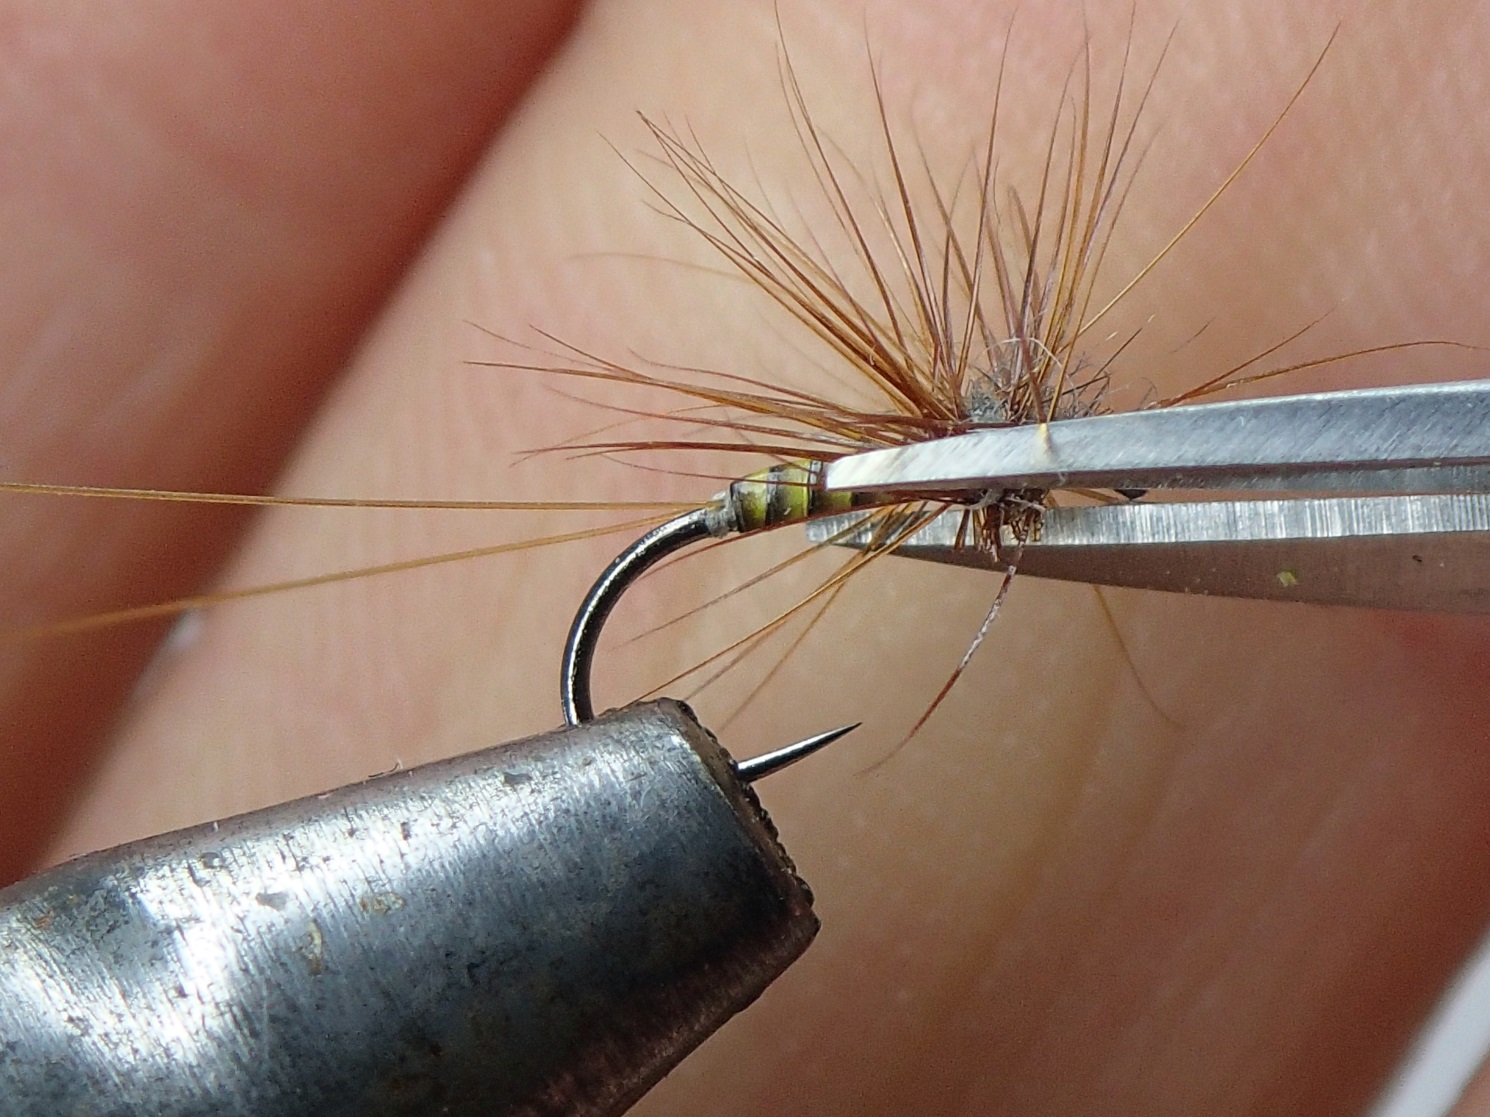
- Wind on three or four turns of hackle snug against the body catch in with one or two turns of thread.
- Now dub on a tiny amount of mole fur (I apply a tiny amount of wax). Carefully wind the dubbed thread in between the hackle fibres leave thread at eye ensuring and spare dubbing is removed.
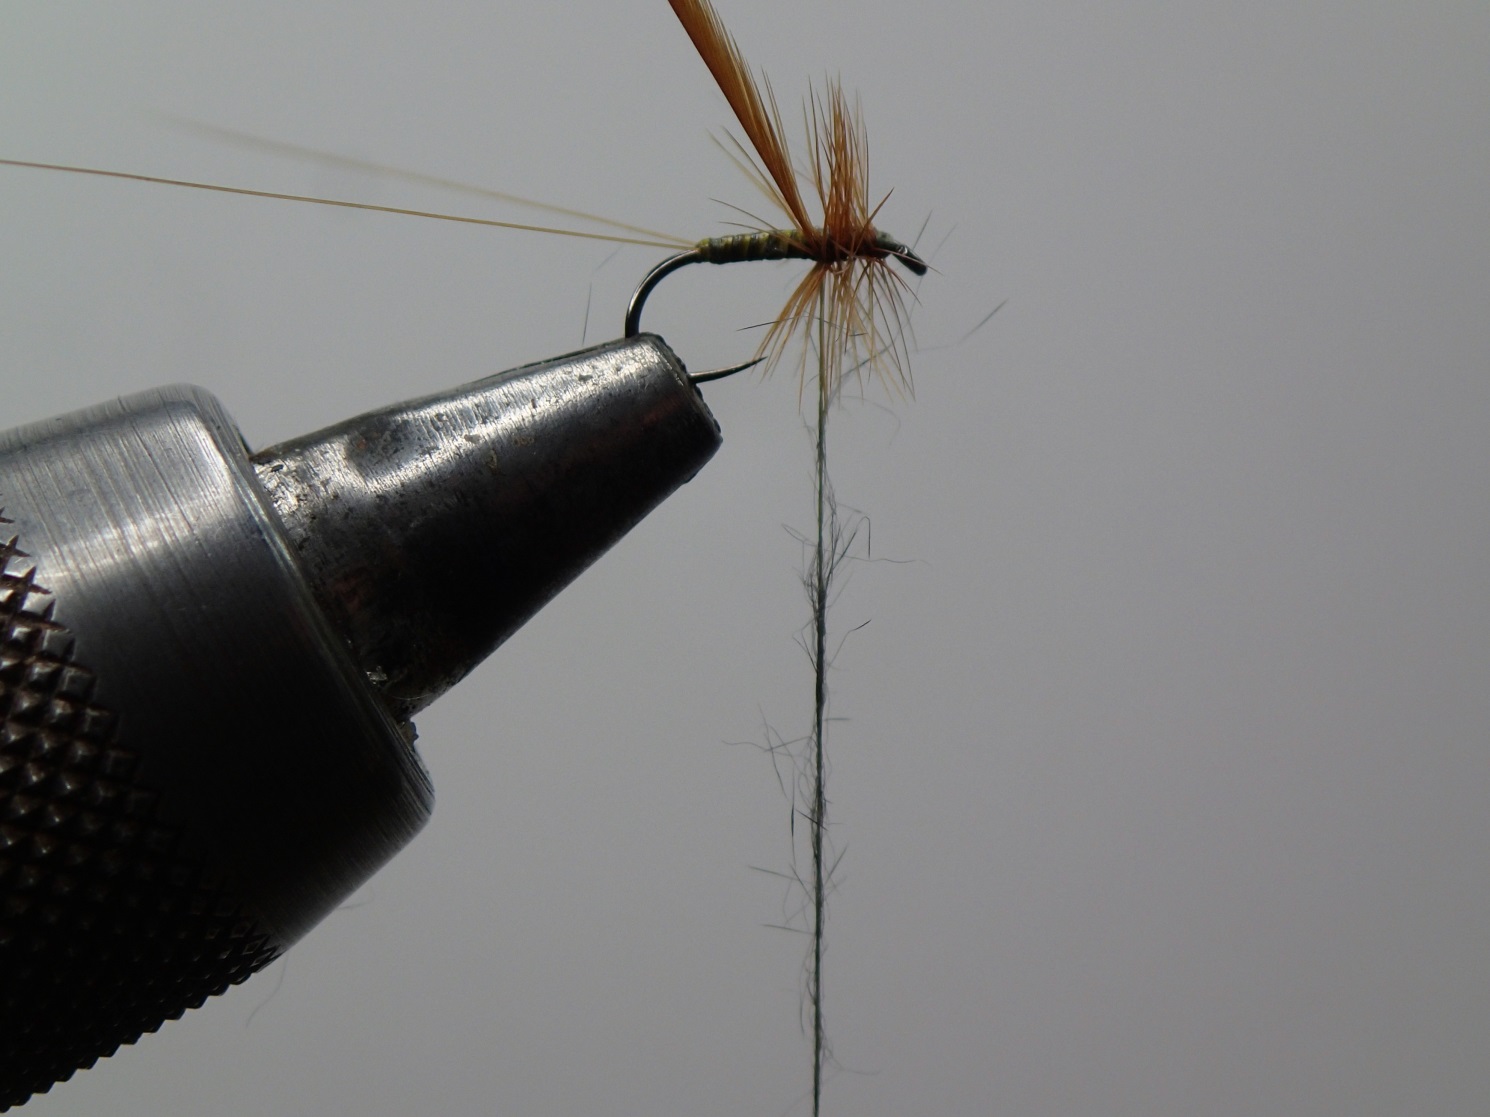
Lightly dub.
Wind through the hackle.
- Push back hackle and whip finish.
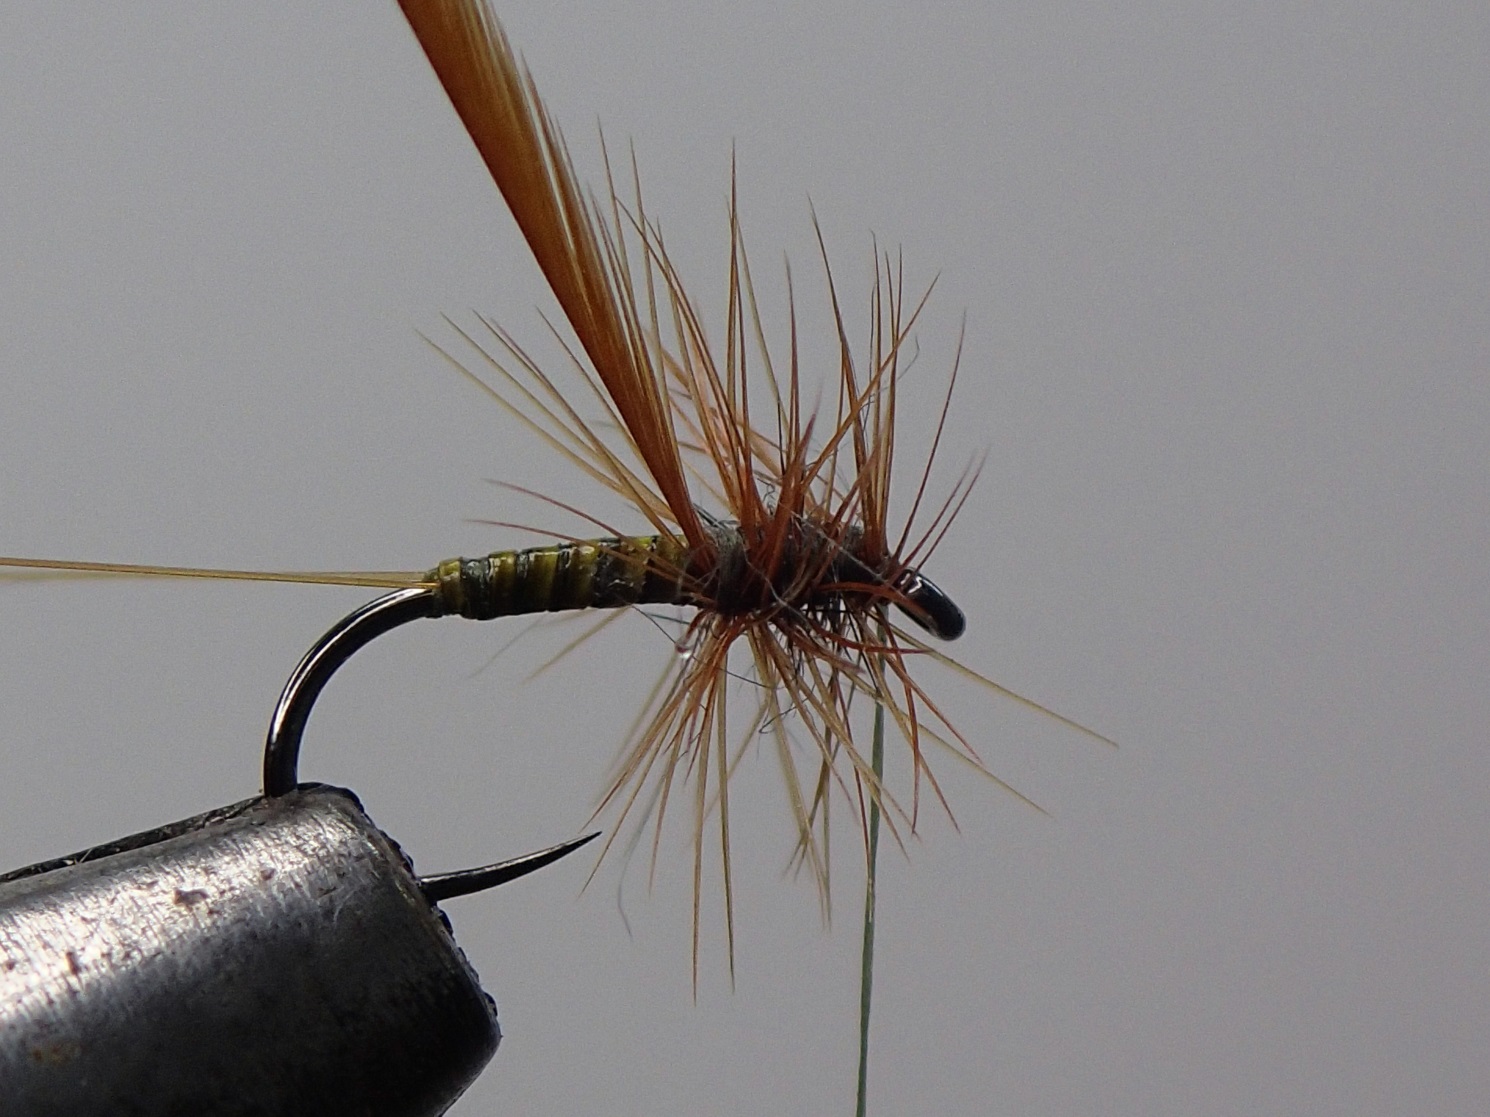
Trim thread and apply varnish with a sewing needle.
- I like to give the hackle a haircut and trim off underneath to ensure the fly sits well in the water.
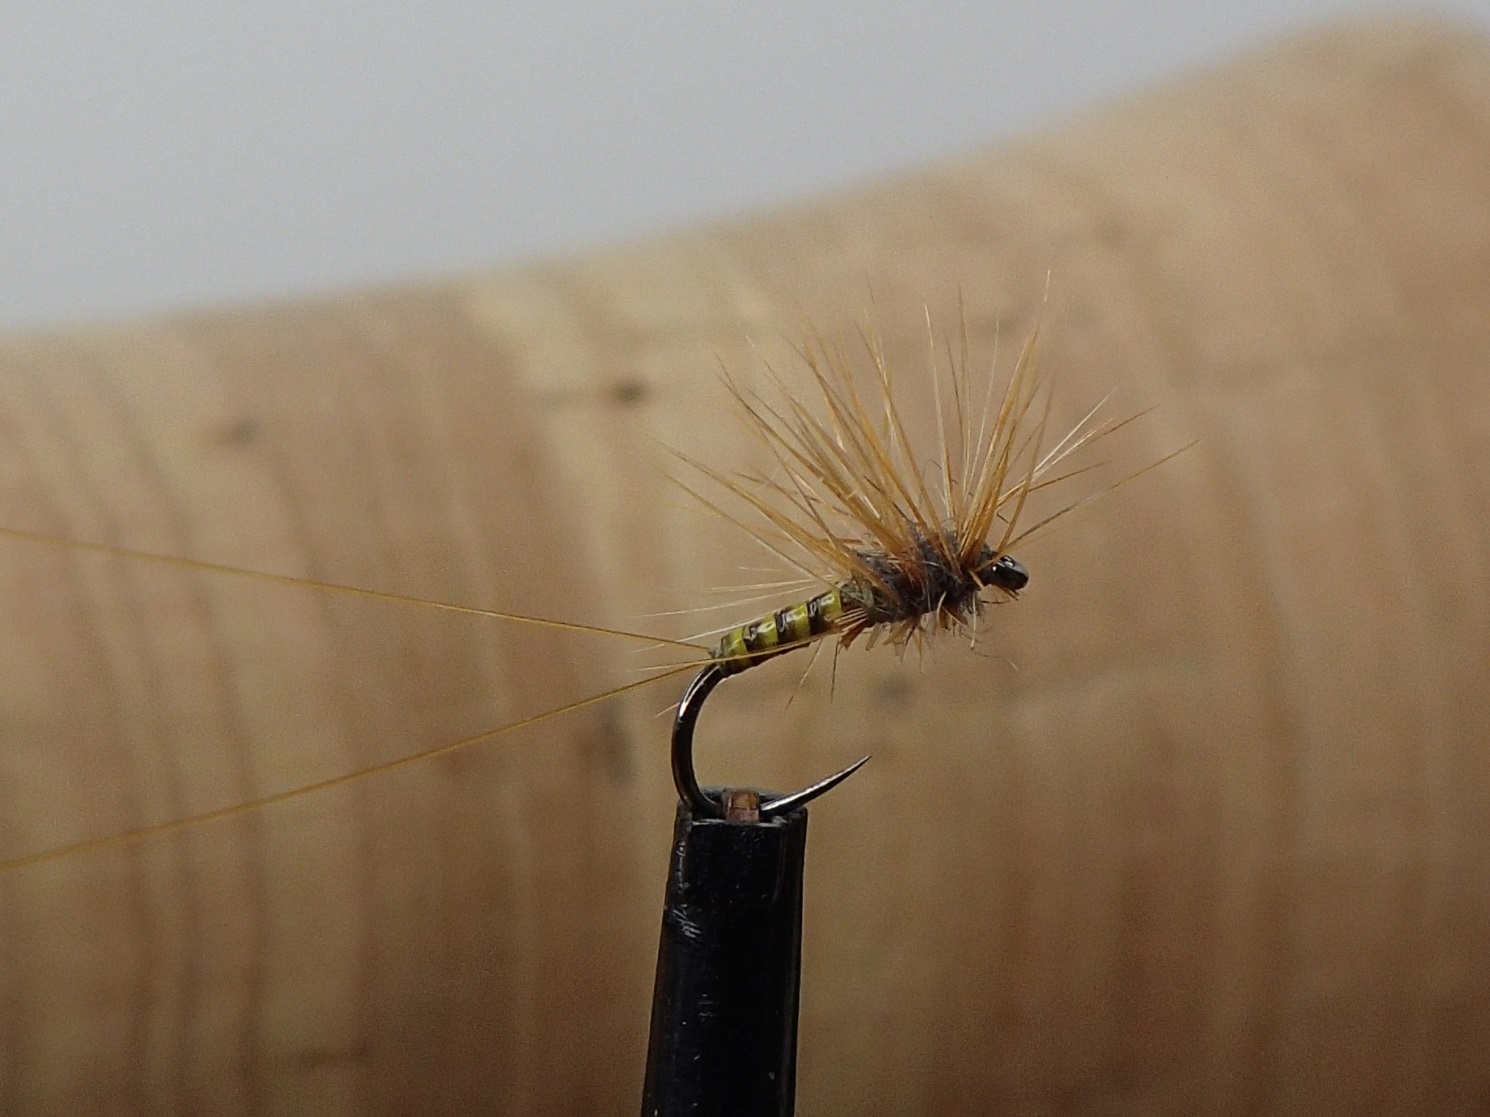
The finished fly
Look out for these:
- Take time to ensure the tail microfibbets sit on top of the shank and split with a nice wide ‘v shape’.
- Although easier said than done with a small body, try to ensure the quill body still has the definition showing the black edges.
- As mentioned before do not overdo the mole fur dubbing.
Summary
To me the most important part of the fly is the long split tail; it helps the fly sit well in the water and definitely acts as a trigger point as mentioned before. Although not a ‘classic’ technique I like running the dubbed thread through the hackle, it splays the fibres out giving an uneven finish. And when trimmed underneath the hackle takes on a ‘hedgehog’ effect.
Although I have made reference to the small fly websites, this fly is by no means the ‘work of art’ type patterns seen on these sites. Their creations go down to staggering #28, #30 and even smaller. The thread I use and no doubt the tying technique would be over the top for these tiny masterpieces.
However it is still fun to tie and more importantly, fish with, whilst being a step in the right direction of even smaller creations. After tying a few, a #16 seems enormous.
Now where did I leave the box of #26 !!!!
Have a great month and for those of us in the UK let’s hope spring finally arrives!
You can contact Warren via email or call him on 07771 558 028.